

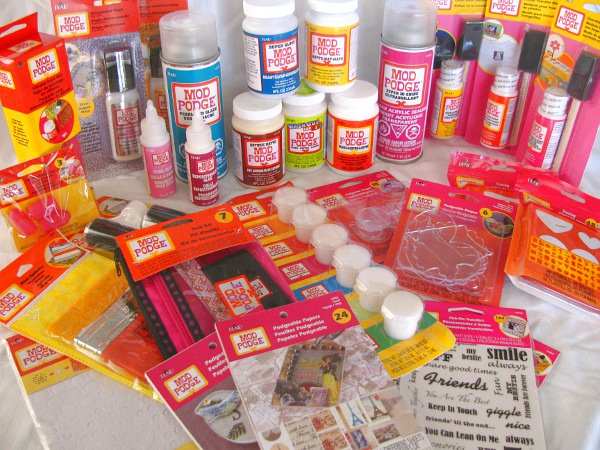
Seriously. I mean . . . SERIOUSLY! And all they asked in return was that I create something with those cool products and teach y'all how to make it, too. Ummmm, OK. Twist my arm, right?! Before we get into the project I came up with, let me point out a few of the things that got me most excited.
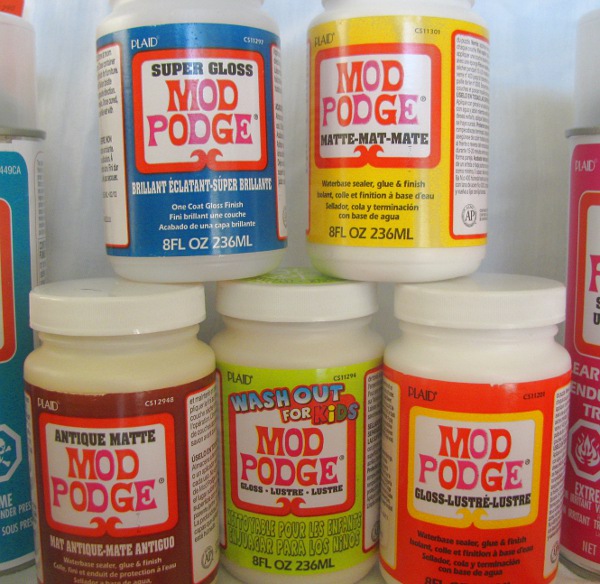
Look at all these different formulas of Mod Podge. I have only ever worked with the Matte and Gloss varieties. I'm super intrigued by the Antique Matte variety. Hello Awesome, where have you been all my life? And the washout one for kids?! Oh, that will be a hit with my 3 monsters. I'm also really liking the Super Gloss finishing formula. It's really more of a sealer than an adhesive, but it lives up to its name. Shiny, shiny.
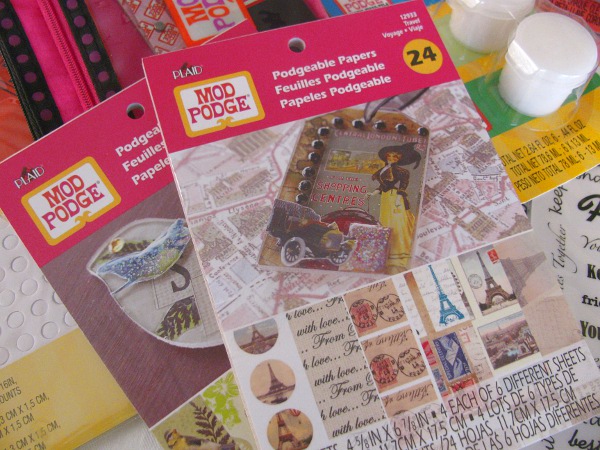
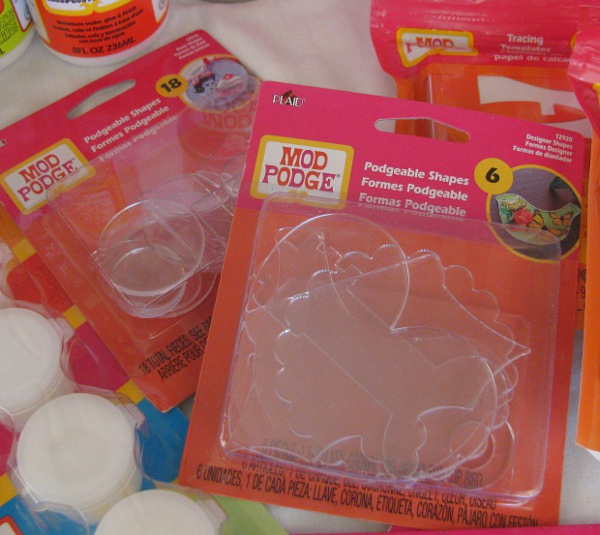
These Podgeable Papers and Shapes are also really cool. Sooooo many things to do with those! I'm told you can find all of this great stuff at your local Michael's craft store. Sweet!
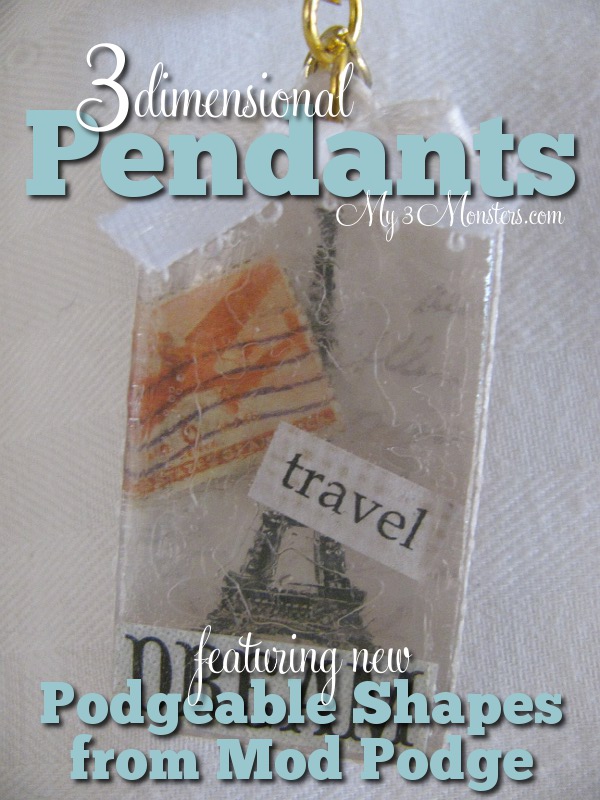
What did I make with these delicious new products, you ask? After kicking several ideas around, I finally decided on 3 Dimensional Pendants using the Podgeable shapes and papers. In the pack of smaller Podgeable shapes there are three each of six different sizes and shapes. One of the three in each shape set has a little loop at the top, making it perfect for hanging from a necklace.
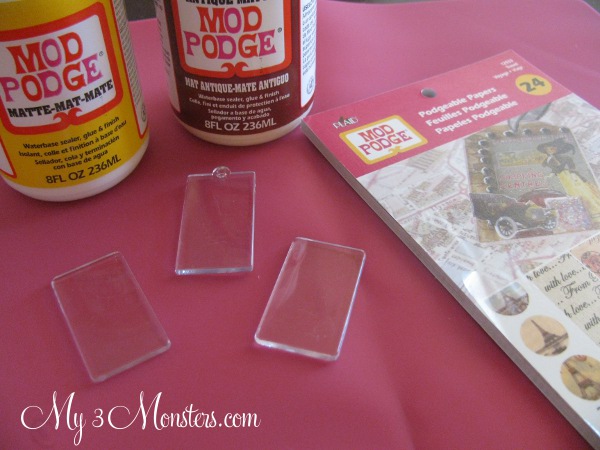
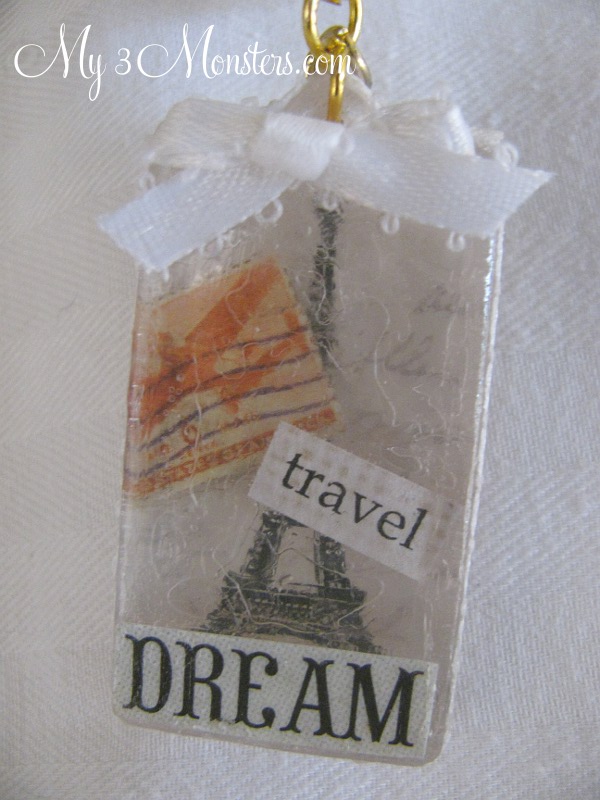
The difficult part of this project is deciding which images to use from the Podgeable paper sets. There are some really beautiful designs to choose from. Ever since Girls Camp this year, I've been a little obsessed with vintage travel images so that was the first thing I decided to do. You can pick several different elements because you're going to sandwich them in between the little plastic layers to make a really cool "shadow box effect".
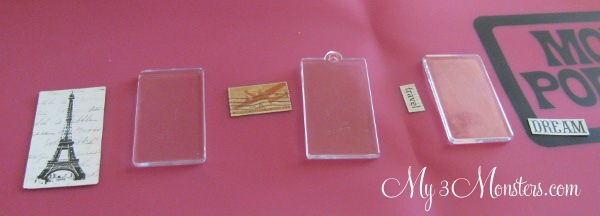
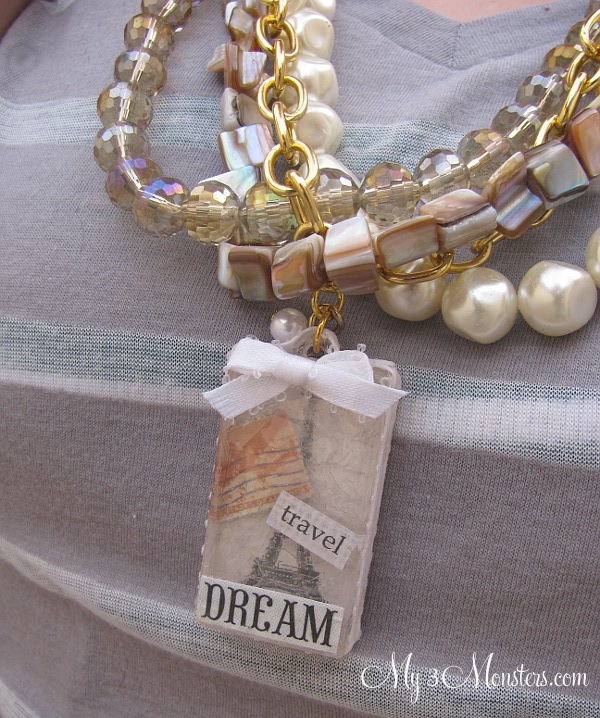
To begin, I laid out all my elements in the order that they would be added and used a thin layer of the Matte finish Mod Podge to attach the images to the plastic shapes. The Eiffel tower was attached to the back of the first rectangle and the postage stamp got stuck on top, kind-of hanging off the side. The word travel got Mod Podged to the front of the shape with the loop {the middle piece} and the word dream was stuck to the front of the top piece.
Once all the layers were dry I painted a thick coat of the Matte Mod Podge in between each of the plastic layers and stacked them up, lining up the bottom and side edges. {Also, trim off that piece of the postage stamp sticking out. You don't need that.}
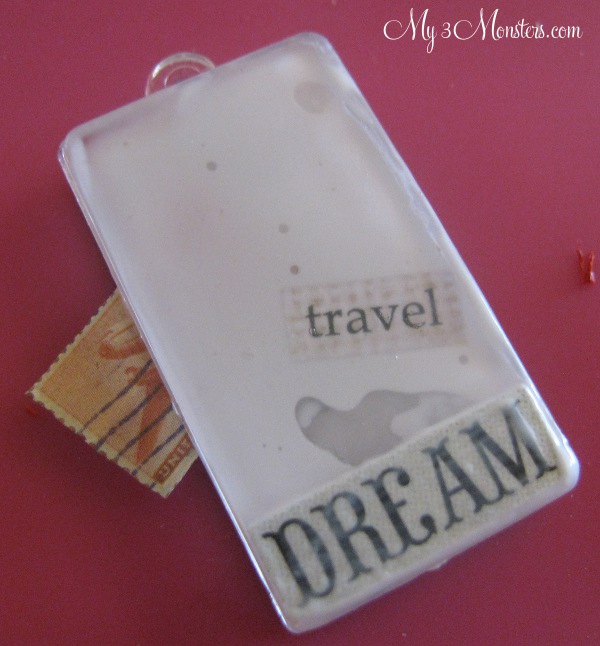
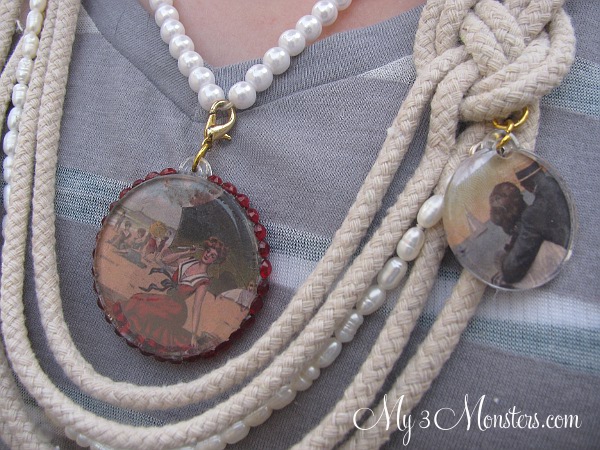
I think that looks cool-ish, since the images I chose are old looking. If you don't like that look {or you don't have a week to wait} just use a thinner coat of Mod Podge between the layers. Much thinner. OR, even though this may not be its intended use, a thin layer of the Super Gloss finishing formula worked the best for me to stick layers together without any distortion. That's what I used on these vintage seaside pendants and they turned out beautifully.
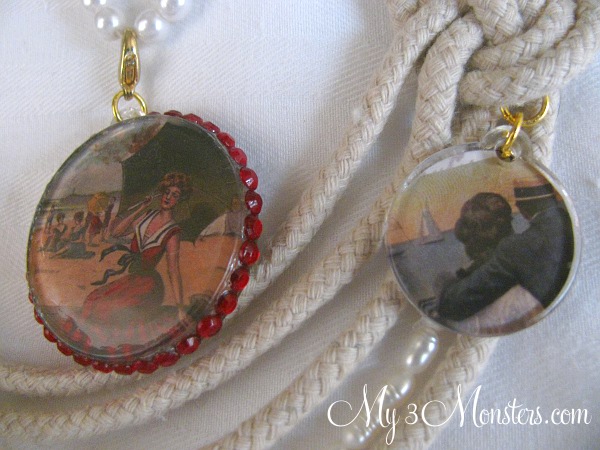
Super Gloss is not meant to be an adhesive so use it at your own risk, I guess. Mine are holding up great so far. The Eiffel tower pendant has 3 layers of Podgeable shapes, but the seaside pendants are a little simpler. The big one has two of the plastic shapes with one image sandwiched in between and another decorative paper on the back side.
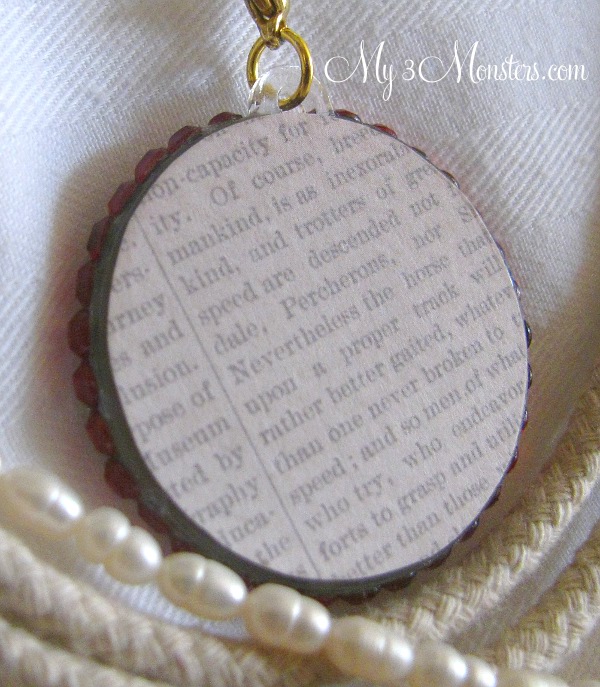
The smaller pendant is just one plastic piece with the image Mod Podged on the back. That's what's fun about this project -- you can do just about anything you want!
Once the adhesive between your layers is dry, you're going to want to coat the whole thing with a layer or two of Mod Podge {in whatever finish you want} for protection. I did a couple layers of Super Gloss on the front, back and sides of each piece.
You could stop here, but I wanted to hide the seams on the side to make them look more finished. On the Eiffel tower pendant, I used E6000 glue to attach thin white ribbon around the edges and a tiny bow at the top. On the larger nautical pendant I used E6000 glue to attach tiny red crystals around the seam between the two plastic pieces. The small, single layer pendant looked great without any edging.
At this point, you're pretty much done. Just add jump rings to the loops on top of your Podgeable shapes and they're ready to hang from a chain or a pretty piece of ribbon. I paired my Eiffel tower pendant with this cool necklace from Tori Spelling's new jewelry line {also available at Michael's} to give it a little different look.
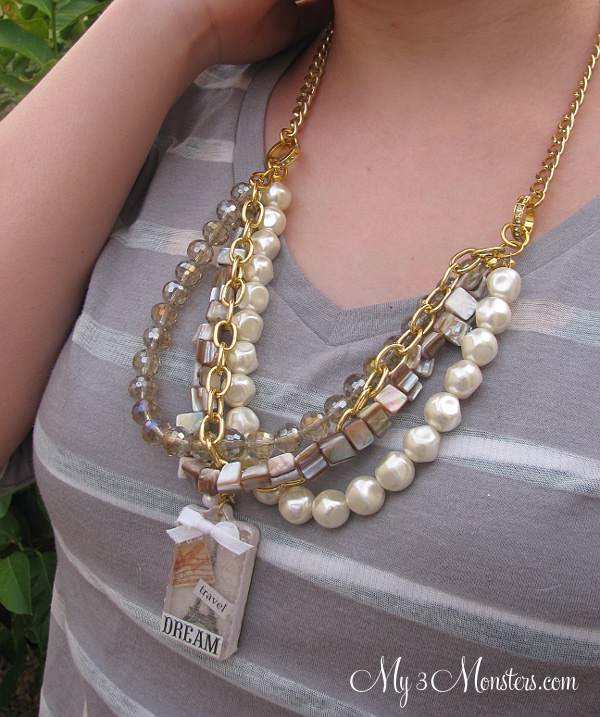
Pretty, right? I like it a lot.
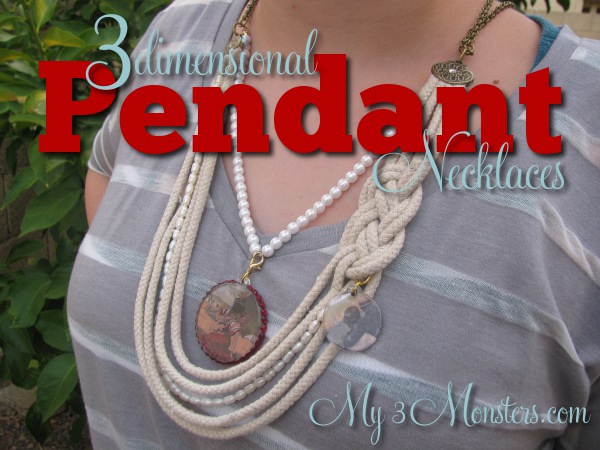
For the vintage seaside pendants, I wanted to create a necklace using rope tied in a cool sailor's knot I had seen on Pinterest. I used some natural clothesline rope I had on hand and followed the tutorial on the link to tie the knot, then laid it out with my pendants to decide how I wanted the finished necklace to look.
I loved the rope knot with the pendants, but thought it needed an extra "something" to class it up a bit. I grabbed a couple of pearl necklaces from my jewelry box that I haven't worn in years {I hate chokers} and knew they were just the thing. Using a jump ring I attached the smaller pendant and one string of pearls to the bottom of the knot by feeding the jump ring through several of the strings of the rope before closing it.

Once that was situated exactly how I like it, I cut the ends of the rope to the length I wanted. I used a couple of decorative jewelry end clamps to finish the raw edges of the ropes. Before scrunching all the ends of the rope and pearls in each side, I added a dab of E6000 glue to help things all stay put.
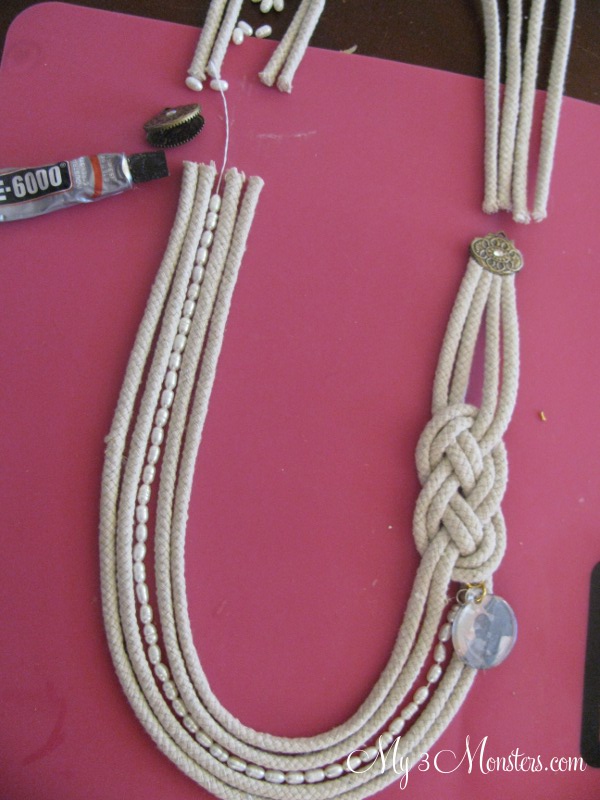
If you like shorter necklaces, you could just add a clasp at this point, but I wanted it to hang a little longer so I attached a length of chain to each end. I also wanted to add one more layer of fun to the necklace so I strung another old pearl necklace between the two decorative ends of my rope section and hung the larger seaside pendant from that strand using a lobster clasp. {I was thinking that would make it easy to add or remove the pendant to change up the look of the necklace, but I really don't like the look of it, so I'll probably just use a jump ring to hang the pendant from the pearls "permanently".}
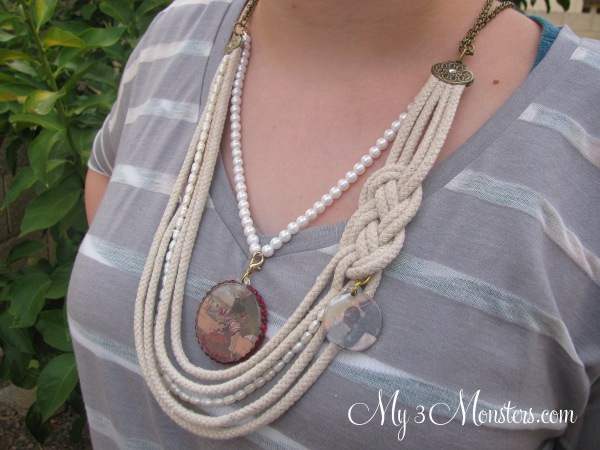
I have to say, this one is my favorite. Isn't it just dreamy with the pearls and romantic vintage seaside scenes? I have the perfect nautical striped maxi-skirt to wear it with this summer.
There you have it! An easy, inexpensive way to make some unique new jewelry that looks like a million bucks! For more awesome Mod Podge project ideas and information, follow Plaid Crafts on Pinterest, Facebook, and Twitter.
Check out all the other cool projects crafters have made with these new products:
Come back tomorrow for more details about how I created the 3 Dimensional firecracker art that I created using the larger Podgeable shapes!
I wrote this post as part of a paid campaign with Plaid Crafts and Blueprint Social. The opinions in this post are my own.


Love it! I actually had a very similar idea so next week when it's my turn to post you'll see my idea!
ReplyDeleteOooh! I can't wait to see what you have up your sleeve!! Aren't they fun?!
DeleteThese look great! I'd thought of using them for jewelry as well, good job!
ReplyDelete-Molly (TBS Mod Podge Launch)
www.justalittlecreativity.com
Very cool and imaginative.
ReplyDeleteI am in LOVE with that rope necklace! It would be pretty even on it's own, but the Mod Podge pendants certainly add the perfect touch. Love all your Mod Podge goodies, have fun with your next creations!!
ReplyDeleteThanks!! It's my favorite. My friends are going to get so sick of seeing it this summer . . .
DeleteWow! Wow! I love your necklace such a creative way to use the podgeables.
ReplyDeleteThanks! They're so versatile. I had a thousand ideas for using them. So much fun!
DeleteThese are so cute!! I love how the podgable charm looks with the rhinestones around it. What a fun idea!
ReplyDeleteThanks Michelle!
DeleteWhat an adorable idea! I always get scared of making my own jewelry but this looks very "doable".
ReplyDeleteThanks Katie! It is COMPLETELY doable. Super simple and fun!
DeleteOh my, I love that! That is a great necklace. LOVE the rope! So unique.
ReplyDelete