

If you're joining us for the first
time today, this is day 15 of a 31 day series about how to give a room in
your home a brand new look, from top to bottom, completely DIY.

Today's project isn't ground-breaking. You've probably seen about a million versions of framed chicken wire across the internet. That's OK. A great idea is always a great idea, no matter how many people use it. Here's why I love this idea for this room: it's pretty AND practical AND inexpensive. Win, win, win.
Since Sydney got her hair cut short last spring she has a real penchant for chandelier drop earrings. I'm so tired of finding those earrings laying around the house. They needed a home. I found a big framed wood board with geese painted on it at Goodwill one day for $3 and knew I could use it for something. My husband raised an eyebrow, but he has learned to trust me on things like this. Good man. I had hoped to be able to separate the wood backing from the frame, but they were hopelessly stuck together. I was still determined to make it work.
I started by having my husband sand those geese right off the wood so I had a nice, smooth surface. Then I painted the whole thing using the navy blue paint used on the walls. I wanted the frame to blend in so that the jewelry hanging on the board would be the star. Using a few simple tools that almost everyone has, I attached the chicken wire to the front of the board.
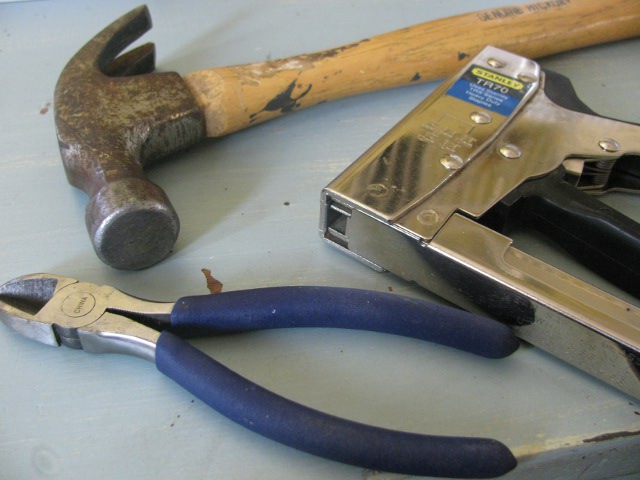
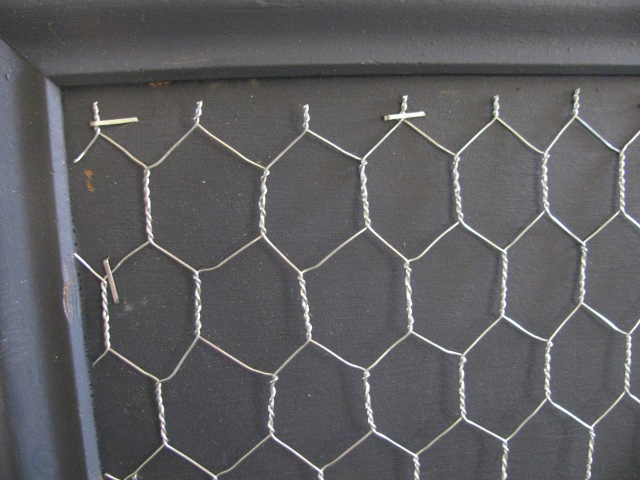
I was a little wary about working with chicken wire, but it was easy. I laid the chicken wire across my frame and stapled it down on the top edge with a staple gun. Then I used basic wire cutters to trim it to size and stapled down the other edges. My board was wider than my chicken wire {yes, even shorter side was too wide -- I tried everything, including stretching the chicken wire} so I had to make a seam down the center. That's not ideal, but it turned out alright.

Once Sis loads up the board hopefully she can hide that seam with a few strategically placed pictures. I went back and hammered in my staples to make sure they weren't sticking up anywhere.
Normally people use empty frames so they can staple the chicken wire to the back of the frame and hide the staples. Since I couldn't remove my frame's backing I had to staple on the front, so I needed a way to hide those rough edges. That was kind of a blessing in disguise because it gave me a great opportunity to fancy up the board a little bit.
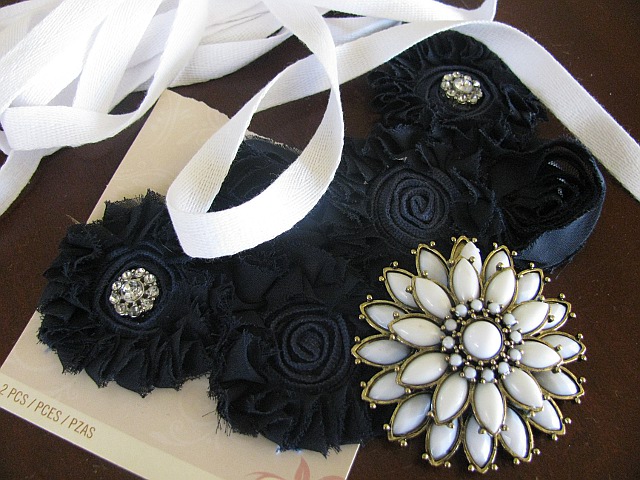
I gathered some twill tape and embellishments from my craft closet that I thought would look cute. Using hot glue I outlined the edge with the twill tape, covering the rough edges and staples. You could also cover your center seam, creating a window pane effect, but I decided to try to hide the seam with items on the board instead. Then I hot glued the floral embellishments on one of the corners. I wasn't planning on doing that originally, but Sis and I thought they made it extra pretty and feminine.

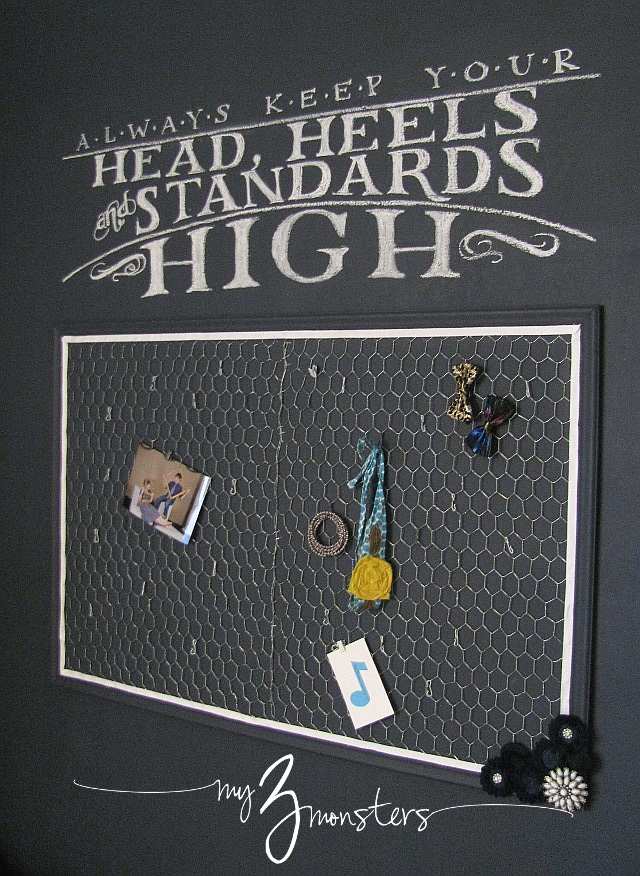
There were extra S-hooks and clips in the package of curtain clips I bought at IKEA for the curtains so we hung those from the chicken wire to hold necklaces and bracelets. {You could buy small S-hooks at the hardware store if you don't have them on hand.} She can also use the clips to hang snapshots of her friends or handouts from church -- whatever she wants. I hung it on the wall right above her bed using Command adhesive picture hanging strips. I love the way it looks underneath our chalk art quote.
Thanks for stopping by today! Join us tomorrow for a quick, but dramatic side table makeover.


0 friends said::
Post a Comment
Thanks for leaving a comment. I try to respond to every one, even if it takes me a little while!