My 3 Monsters: March 2013

Recent Posts

3.30.2013

Yard Stick Basket
{and Why My Kids Have Weird Easter Baskets}

How to make a decorative basket out of yardsticks.

Hello!  I'm going to share the "how-to's" for my fun yardstick basket with y'all today, but first you have to listen to a fun fact about my family.  Or just skip ahead.  I can't very well make you read all this can I?  My kids have weird Easter baskets.  Not weird, necessarily, more like . . . unique.  It began with our eldest child.  When she was a toddler I found a beautiful wooden {not woven} basket with a butterfly carved and painted on the side.  She got lots of attention over it at her first Easter egg hunt that year, which she loved.


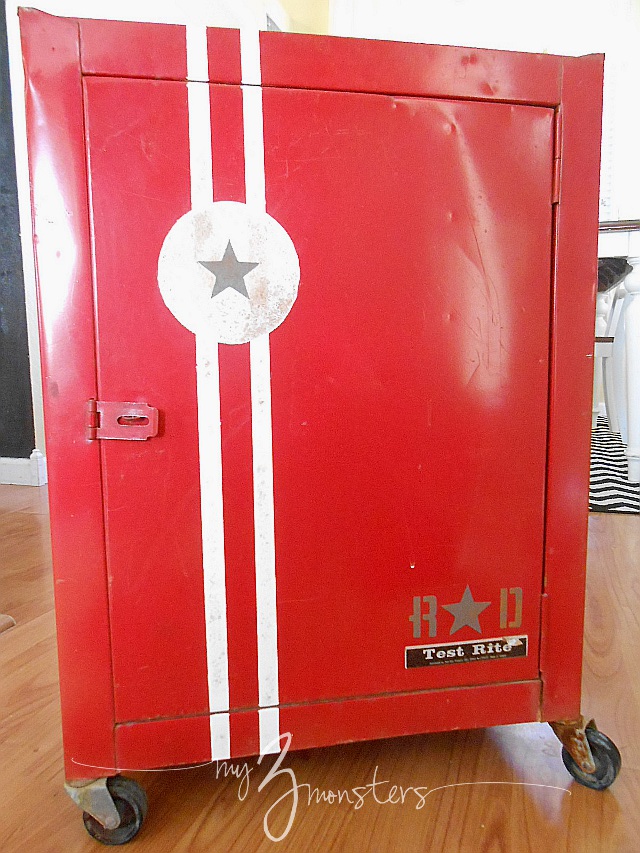
So when baby number two came along we decided that he needed a basket equal to hers in uniqueness.  When I found an old tool box in my parent's garage that I had made in Jr. High shop class, I knew we had found just the thing.  Plus, my kids would forever know that I got an A on that project because my teacher had written it on the bottom.  I stained the outside a dark walnut and painted the inside yellow and it was perfect.  

DIY Easter Basket

Sorry for the horrible photo.  I couldn't find it on my computer so I had to scan in a scrapbook page.  You get the idea though, right?  Then baby number three came along when number two was only 18 months old and I was completely overwhelmed.  So he just got a boring old basket I picked up at Michael's.  And eleven years later he is still using that old thing.

DIY yardstick basket project


It was fine.  I mean, a basket's a basket.  But unique baskets are kinda' our thing.  It was time he got a new one.  I found a wire basket in the dollar section at Target that I thought was pretty cool, but my husband didn't think it was any better than the old one.  I got to brainstorming  Pinterest-ing and saw a picture of a basket made from vintage yardsticks.
Yardstick basket

It took a little digging, but I found the source for the image: A little shop in Georgia called Beyond the Door.  Oh, how I wish I could shop there!  It looks glorious.  Since I can't shop there, I decided to give it a go and attempt to make my own version.  I had the wire basket to use as a base so I decided to glue my yardstick pieces to that.  I found that the cheapest place {by far!} to buy yardsticks is Lowe's at 79 cents a pop.  Ideally, it would have been nice to buy vintage yardsticks somewhere, but I was too impatient to bother looking.

By doing a little quick math to find the diameter of the bottom of my basket and dividing that by the width of my yardsticks, I knew that I would need 13 pieces to fit around my basket.  The pieces needed to be 6.5 inches tall, so I needed 3 yardsticks.  I wanted a little variation so I got two at Lowe's and bought one slightly more expensive one at Hobby Lobby. {It was only $2 on sale.} 

I didn't want all the Lowes branding on my cheap yardsticks {Sorry, Lowe's!} My favorite first son set to work sanding all the blue text off of the yardsticks. Don't worry, I love all my family.  He's only my favorite until someone else does a tedious job for me.

Making a yardstick basket

My husband cut all the yardsticks into 6.5 inch chunks -- see, now he's my favorite -- then I used E6000 glue to attach the sticks to the wire basket, covering as many of the wire slats as I could with the wood.  I used blue painter's tape to hold the yardstick pieces in place while the glue set up.

How to make a yardstick basket

I let it sit overnight just to be sure it would hold up.  As an additional measure to secure it all for good {and to hide the metal ring going around the center of my base basket}, I attached a metal strap from the hardware store around the center and tightened it all up.  Those yardsticks aren't goin' anywhere anytime soon!

DIY yardstick basket tutorial

Looking at it now I wish I had spent more time rounding the corners of the yardstick slats and doing a little antiquing of the wood, but in general I'm pleased with how it turned out.  The newer-looking yardsticks and metal strap lend it a more modern industrial flavor, which is great for a boy!

DIY yardstick Easter basket tutorial

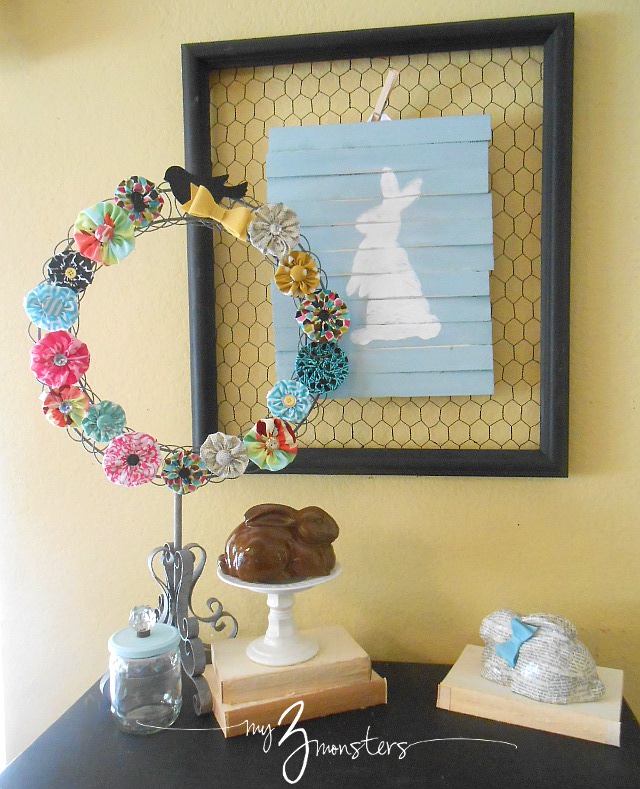
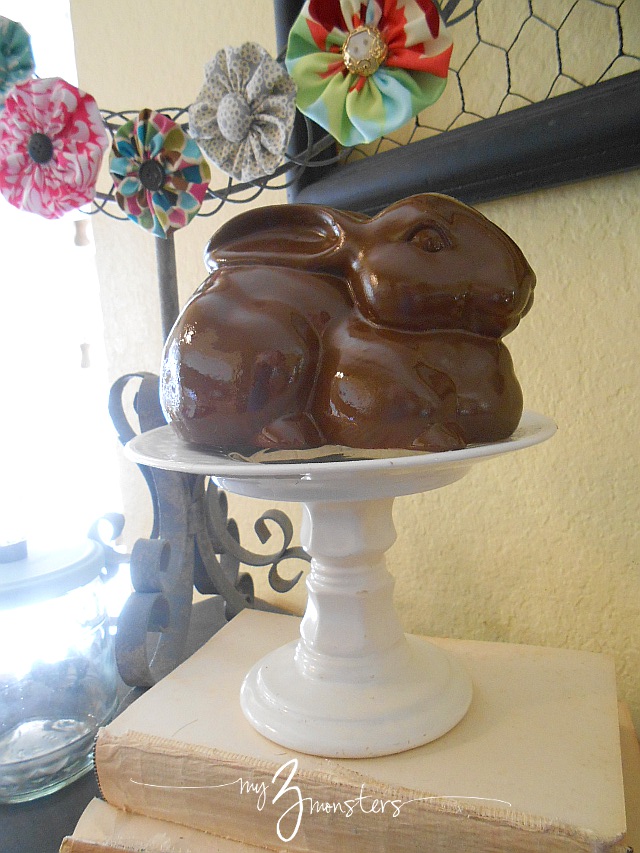
{Read more about that "chocolate" bunny in this post.}  It's so much more fun than just a plain old basket.  I think I'd like to make a couple more, staying more true to the original inspiration, to use in my pantry.  What do you think?  Are we crazy with our odd Easter basket obsession?

I wish you all the happiest of Easter weekends, my friends!!  Of all the blessings in my life for which I am profoundly grateful, the atonement and resurrection of my Savior, Jesus Christ, brings me the most joy and peace.   Enjoy your day tomorrow.                                       

I'll be linking up at:

3.27.2013

Bright Spring Yo Yo Rosette Wreath

How to make a super easy bright spring wreath with yo yo rosettes
I showed you guys my Springy/Eastery display in my entryway the other day and told you how my favorite element, the bright wreath, was kind of a happy accident.  It began its life as a display of yo yo rosette hairclips at a craft boutique I did Friday night, but it was too pretty to take down when all was said and done.  You may not have one of these wire-card-holder-wreathy-thingies, but you could just as easily create a pretty Yo Yo Rosette wreath with a styrofoam wreath form from the craft store.

You'll need:  

-a wreath form of some sort
-ribbon or fabric strips to wrap your wreath form {if you are using a styrofoam form}
-16 to 20-ish Yo Yo Rosettes {or more if you want a fuller looking wreath} -- instructions to follow
-hot glue
-buttons or other centers for Yo Yo rosettes

To Make the Yo Yo Rosettes:

Fabric Yo Yo Rosette Tutorial

1. Create a circle template to cut your fabric.  You can use a compass or trace a plate -- whatever works for you.  Just remember, your finished yo yo will be roughly HALF the size of the circle you cut.  Cut your circle out of your desired fabric.  You can see on my wreath that I used two different sizes -- a 5.5" circle and a 4" circle for some variety.
Fabric Yo Yo Rosette tutorial

2. Using a needle and thread, stitch around the outside edge of the circle on the WRONG side of the fabric.  Keep your stitches about 1/4" away from the outside edge, and gather it tightly as you go.  {I should have rethreaded my needle since the thread was so short, but I was too lazy.}
Fabric yo yo rosette tutorial

3.  When you are finished stitching around, pull the thread taut to gather all the fabric up into a nice tight center and tie the end of the thread off.  Lay your finished Yo Yo flat and arrange the gathers so it looks nice.
Fabric Yo Yo Rosette tutorial

4.  Your basic Yo Yo is finished.  Now for the fun part -- embellishing.  I like to try to use a variety of things, like vintage buttons, covered buttons, jewels, and plastic cabochons on my rosettes.
Fabric Yo Yo Rosette tutorial

5.  Attach your center of choice.  I usually use jewel glue or hot glue, depending on what my center is.  You could also sew buttons on if you want.  At this point, if you are using a styrofoam wreath form you are done.  Just make 20-or-so more rosettes and either use hot glue or straight pins to attach them to your wreath form.  If you want to create Yo Yo Rosette hair clips, continue to the next step.

6.  Using hot glue, cover a metal hair clip with ribbon as shown below.
How to cover a metal hairclip with ribbon

Leaving the bottom prong of the hairclip uncovered makes it easier to slide in and out of your hair.  At least that has been my experience.  Once your clip is all prettied up, attach the  rosette to the top {ribbon covered side} with a dab of hot glue.

How to make a spring wreath out of fabric yo yo rosettes
I simply clipped all my finished clips onto the wire wreath frame so that we can still use them for our hair {Sis and I} after I change out the entry decor.  I don't know though . . . this wreath may have some staying power.  The pretty bright colors may keep me loving it throughout the summer!

Bright spring fabric yo yo rosettes

Bright spring yo yo rosette wreath detail
 That little black bird displayed the price at the craft boutique.  I thought it made a cute little addition with the felt bow at the top so I erased the price and left him up there.  What do you think?  Are you feeling the spring fever?!  Ready for Easter this weekend?  I am!!  Hope your week has been great, my friends.

I'll be linking up at:
Lil\'Luna

3.26.2013

Orange Dream Cake

jello poke cake, orange and vanilla

Monday night is one of the few night a week that I make dessert.  I love to bake, but I'm also pretty lazy.  Baking = effort = more dishes = more effort.  Monday night is Family Night around here and if we're going to ask our children to endure an evening in our company, we've learned that we better sweeten the deal somehow.

One of our favorite desserts is Poke Cake - that delightful blend of cake and jello and pudding and cream.  It's easy {yay for me!} and super light and refreshing {which makes it perfect for spring and summer}.  I've always used raspberry or strawberry jello in the past, but this week , on a whim, I grabbed orange jello instead.  Orange Cream Cake -- or "dream" cake because it's so delicious!  This may be my favorite flavor I've ever tried.  Try it and let me know what you think.

Orange Dream Cake

1 box white cake mix {and ingredients to prepare}
1 large box of orange jello
1-1/4 C. boiling water
1 large box of instant vanilla pudding
2-1/2 C. milk
1 container Cool Whip
Bake cake mix in a 9x13 pan according to package directions.  While cake is still warm, poke holes in the top of the cake using the handle of a wooden spoon.  You could use a fork, but I like nice, big holes for the pudding to fill up.  Mix Jello with boiling water until completely dissolved and pour over cake.  Allow cake to cool completely.  Mix pudding and milk and pour over the top of cooled cake.  Chill for several hours -- overnight is best.  Before serving, frost with Cool Whip.
creamy orange jello poke cake
 Just look at the pudding.  And the orange-infused cake.  Oh my goodness, I'm drooling just thinking about it.  This would be an excellent dessert to serve for Easter this weekend.  If you drop by my place Sunday you may just get yourself a piece!  

Have a great week, all!  Tomorrow I'll be sharing how to make the yo yo rosette clips that I used on my spring wreath.  I hope you'll come back.

3.25.2013

An Easter Vignette in a Decidedly Un-Model Home

This little dresser next to our front door is the perfect place to add a few little decorations that I can change out to fit the seasons.  It is also the perfect place for everyone to drop their junk as they walk in the door.  It is also the perfect place for homework supplies to pile up when we clear everything off the dining table to set it for dinner.  Never mind the five, cout 'em - FIVE, drawers in the dresser designed to contain all the aforementioned junk.  Whatever.

I find that if I fill up the top of the dresser with pretty tchotchkes, my family is less likely to pile their junk up there, and use the bottom few stairs instead.

{Note that I said less likely, not completely deterred. Also note that the junk pile just switches locations, not disappears.  However, the stairs are actually a few feet closer to where all that stuff actually belongs.   Any little bit helps.}

I'm loving bright, pretty colors this spring.  I did a little craft boutique over the weekend and made a million of these yo yo rosette hair clips to sell.

Friday night after the boutique I was too tired to put everything away and left this wreath stand  . . . out on top of the dresser.  {I guess I'm a part of the junk-pile problem, too.}  It looked so pretty and springy that I decided to leave it there as part of the spring/Easter vignette.


I picked up the bunny figurines last spring on clearance at Hobby Lobby for about $1 each.  They were super ugly at the time and they took up space in my already crowded craft closet for a year, but I had a vision of what they could become.  One got covered in torn book page strips and Mod Podge with a fun felt bow tie:


The other {my personal favorite} got a coat of Valspar Roasted Coffee gloss spray paint to cover its fuschia polka dots:


It's the perfect chocolate color.  My sweet tooth acts up every time I look at it.  To round out the display, I borrowed this cool Easter Pallet Art idea from Design, Dining  + Diapers, using super cheap wood shims from the hardware store to create the bunny silhouette in my chickenwire frame.


Please ignore the fact that my little glass candy jar is already empty.  Our love of sugar is more powerful than our love of cute-pops-of-color-in-the-Easter-vignette around here.  This is not a model home, after all.  We actually LIVE here.  I love how simple and pretty it is.  I smile every time I walk by . . . as I veer to the pantry for a handful of chocolate chips because that dang bunny makes me so snacky.  And the candy jar is already empty, gosh darn it. 

Whether you're already swimming like us or you're still buried in snow, Happy Spring, y'all!

3.24.2013

To All the Drinks I've Loved Before . . .
Round Two

Coke, my love, this isn't easy for me. Dr. Pepper, you better listen, too. And you Mountain Dew and Pepsi (even though you're just my booty-call when Coke isn't available.) 

 Trust me, it's not you. It's me. OK, maybe it's you a little. You're no good for me. We can't continue this self-destructive little dance. You were always there when I needed you, sure. Hot summer day? There. Afternoon drags? There. The Breakfast of Champions? It's you. All you. In my moments of deepest need you were my bubbly, glistening beacon of hope. You got me through my twenties and early thirties - the all-nighters studying for finals, the days with sleepless infants, the half-marathon.You once seemed to be all I would ever need. 

 But I'm on to you. You are the reason I am fat. Don't deny it. Oh, you talk a good game, playing with my taste buds like you do, but underneath it all you're evil. You're loaded with empty calories and regret. Trolling around with drinks like you is fine for younger women, but I've grown. It's time that I found "The One". Something that will support me in my goals. That will make me feel better about myself. Something I can stick with for the long haul. That's right. Water. 

Yeah, I know what you're thinking. Water is so boring. So . . . . . . boring. I know. I've flirted with water before and always come back to you, but this time is different. This is for good. Listen, it's not like I'll forget the good times. You'll have a little place in my heart forever. When I see you in the grocery store my pulse will always quicken. When I see another girl enjoying you're company I'll salivate just a little. You'll always be my favorite, but I've made my choice. Have a nice life.

So . . . This little "Dear John" of sorts was originally posted on my blog in August of 2009.  Let's just say my relationship with Coke did not end in a clean break.  I don't know what it is about soda that I have such a hard time letting go of.  Maybe it's because it's my only vice.  I don't smoke or drink and I try, in most ways, to be a good, contributing member of society.  I have just always loved soda.  To the extreme.

Until I woke up one morning several weeks ago and didn't.  Didn't really want it.  Certainly didn't need it.  I had more-or-less moved on.  Just like that.  Over night.  It is really strange.  I still have some of the same old habits -- like taking a quick mental survey of the three nearest McDonald's locations every time I start the engine of my van or changing into the right lane every time I approach a Circle K.  Sadly, I'm only kidding a little bit about that.  I've had Coke a few times since I woke up that one crazy morning, mostly out of habit -- at the movie theater or while I was having a hot date with my glue gun getting ready for a craft boutique.  It just doesn't have the same power over me that it used to, and for that I am grateful.  It will be interesting to see if this new love I've found for drinking water will have some staying power in my life.  Wish us luck - water and I - for a bright and happy future together!

Spring Spruce Up: New Pillow Covers and a Router in Disguise

I've been on a bit of a spring cleaning kick lately, freshening and sprucing up our home.  I'm back on my housekeeping schedule and I can't believe how easy it has been to keep my home tidy and add in one or two "big" jobs, like dusting the ledges and cleaning out and organizing closets, every day.  The cleaning itself is very satisfying, but I'm a decorator at heart.  I needed to pretty some stuff up, too.

First on my list was packing up the winter pillow covers in the living room and bringing in some bright spring color.  I brought out my favorite scrappy rosette pillow covers for the little pillows and decided to use some golden yellow polka dot fabric from my stash to whip up new covers for the big pillows. 

I didn't have any zippers in the house and I was too impatient to wait until I had the chance to go to the fabric store and get some so I made simple envelope covers.  {There is a great tutorial over at vixenMade that shows exactly how to make them.  No sense in reinventing the wheel by writing it all out again, right?}

I added a little extra pizazz by sewing strips of gray chevron ribbon to the closure side and tying it closed with cute little bows.  The bows are purely decorative since an envelope pillow cover really stays closed on its own.  I just like bows.  Whatever. 


The golden yellow is the perfect little pop of color on my gray couches.  As I sat admiring my handiwork, my eye was drawn to the eyesore next to the couch -- our computer desk. 

Actually, the desk is fine and I love the setup because it works so great for our family.  The desk is really an old dining table and the end of it serves as an end table between our two couches.  The only issue I have is that you can see the back of the computer monitor {and all the wires and speakers and modem and wireless router and external hard drive} from the couches.  It always looks cluttered and messy.  I saw this BRILLIANT idea on Anamu a while back and decided it was high time to borrow it for my home.


The old books, along with the lamp and plant, totally block the view of the back of the computer and hide all the ugly components.  See:


The book laying flat under the lamp hides the external hard drive.  Here's to dirty little secrets!  In clean houses.  If you ever come over, don't snoop around too much.  I have little secrets like that all over this tiny little house.  And also some dust bunnies usually.  Heaven only knows which you'd find first!

3.20.2013

Tool Chest Makeover
With Handmade Charlotte Stencils


We found this really cool old tool chest at Goodwill a few months ago that I thought would be a fun addition to our boys' vintage auto-shop bedroom.  It was a little rusty and worse for the wear, but I kinda' dig that about it.  And it was the perfect size for a bedside table so I snatched it up.  It was just plain old red to begin with . . .

. . . which was fine, but when I saw these great Handmade Charlotte stencils the wheels in my brain started spinning.  What if I gave it a super-cool painted detail like a vintage race car?!  Ohhhhh yah!


I started by taping off some stripes with masking tape and using my Folk Art acrylic paint in Wicker White to fill them in.
I wasn't too worried about having perfectly straight edges because . . .look at the rest of the chest.  I carefully peeled off the tape while the paint was still wet so that the acrylic paint wouldn't peel off of the metal cabinet with the tape after it had dried.  I'm not sure if that was absolutely necessary since the white paint seems pretty durable now that the whole thing is finished.  You can't be too cautious, I guess.  Now for the secret ingredient to give those crisp white stripes some weathered flair:  Cinnamon.

Sprinkle a good coat of ground cinnamon on the wet paint wherever you want your rust spots to show.  When the paint is completely dry, simply wipe the excess cinnamon away with a damp rag.  Looking at the finished project I wish I had used a heavier hand when applying the cinnamon.  I'm telling you - it is crazy cool.  It looks just like rust when all is said and done.

Once my stripes were dry I used one of my Handmade Charlotte stencils to make the big white circle.

I think this was supposed to be a full moon, but it was absolutely perfect for my vintage race car detail.  I gave the circle a dusting of cinnamon while it was still wet, too.  Once that was dry I used the biggest star stencil in the pack and some Folk Art Medium Gray acrylic paint to add a star in the center of the circle.  As a little finishing touch, I stenciled my boys' initials in the lower corner as well using the alphabet stencils that came in the pack.  I liked the retro look of the letters.  It was perfect for the vibe I was going for.  I sprinkled some more cinnamon and waited a few hours, then . . . . . . VOILA!

Retro tool chest perfection!  My boys love the way it turned out and it fits so well in their room.  Don't you love it when a project comes together like that?  You could add a coat of spray sealer to make sure your paint is protected, but I really don't mind if the paint job gets banged up a bit so I left it alone.  Plus, like I said, it seems to have adhered pretty well to the metal and doesn't want to scrape off easily.  {Your results may vary.}


3.14.2013

You Know What Today Day Is, Right?


March 14th -- 3.14 -- Pi Day!!!!!  I'm totally unashamed to admit that I was kinda' a math nerd back in the day.  My calculus teacher in high school didn't believe me when I told her that I was going to study interior design in college.  She had no idea that underneath the mathematical, order-loving crust of my persona was an artist who had been patiently waiting for her day in the sun.  I still love math.  I really, truly do.  Here are some fascinating facts about Pi:      
Visualizing Pi
Visualizing Pi infographic

Just ignore that it contradicts itself by saying Pi has been computed to over a trillion digits, but there are only 6.4 billion known digits.  Whatever.  The rest is really interesting.  At least I think so.   My family?  Not so interested in Pi.  But they do love PIE so today we celebrate! 

Who am I kidding?!  I'm a bigger fan of PIE than Pi myself.  I've had a Marie Callender's Chocolate Satin pie instead of cake for my birthday every year for most of my adult life.  It's my very most favorite decadent treat.

 Drooling yet?  If you want to celebrate Pi day along with us, Marie Callender's can help y'all out.  Check their website to see the variety of pot pies and dessert pies that they offer and visit their blog to get some fun Pi Day party and craft ideas.  There's also a great printable coupon for $1.50 off a  Marie Callender's pie.   Now that's a sweet Pi Day present.

Run along and celebrate, friends!


I was selected for this opportunity as a member of Clever Girls Collective, and the content and opinions expressed here are all my own.

3.08.2013

Banana Cinnamon Chip Muffins


I've mentioned before that I made quite a splash on the 1983 New Mexico baking scene with my famous banana bread.  It's no big deal, but you're pretty lucky to know me.  Just sayin'.  It's not every day an award-winning baker shares her signature recipe. 

All kidding aside, I had some over ripe bananas sitting on my counter top the other day so I simply HAD to chef up some banana bread.  I hate waiting the 45 minutes it takes for banana bread to bake so I opted for muffins instead.  On a whim I threw in a couple handfuls of cinnamon chips to spice things up.  One word:

Brilliant!!

These were maybe the best muffins I have made in a loooong time.  See that sugary-crust on the top?  And the little pockets of sweet cinnamon?  Heaven. Around our house muffins beat cupcakes as baked snack of choice any day.  It's a chilly, rainy day here in Arizona so a fresh batch may be in order this afternoon. 

Banana Cinnamon Chip Muffins
1/2 C. butter
1 C. sugar
2 eggs
2 bananas, mashed
2 C. flour {white or wheat}
1 tsp. baking soda
1 C. Hershey's cinnamon baking chips

Preheat oven to 350 degrees.  Cream together butter and sugar.  Add eggs one at a time and beat well.  Add bananas, flour and baking sodaStir in cinnamon chips.  For bread: bake in a lightly-greased large loaf pan for 45-55 minutes.  For muffins:  Scoop into lined muffin tins and bake 25 minutes. 


Enjoy!!

Related Posts Plugin for WordPress, Blogger...