

If you're joining us for the first
time today, welcome! This is day 26 of a 31-day series about how to give a room in
your home a brand new look, from top to bottom, completely DIY.

OK, I'm gonna be really honest with you all. This 31-day project just about has me beat. I'm a little worn out. Not complaining, just justifying waiting one more day to share my wing back slipcover with y'all. Plus, I looked at yesterday's project and I really wasn't super happy with it. Let me refresh your memory:
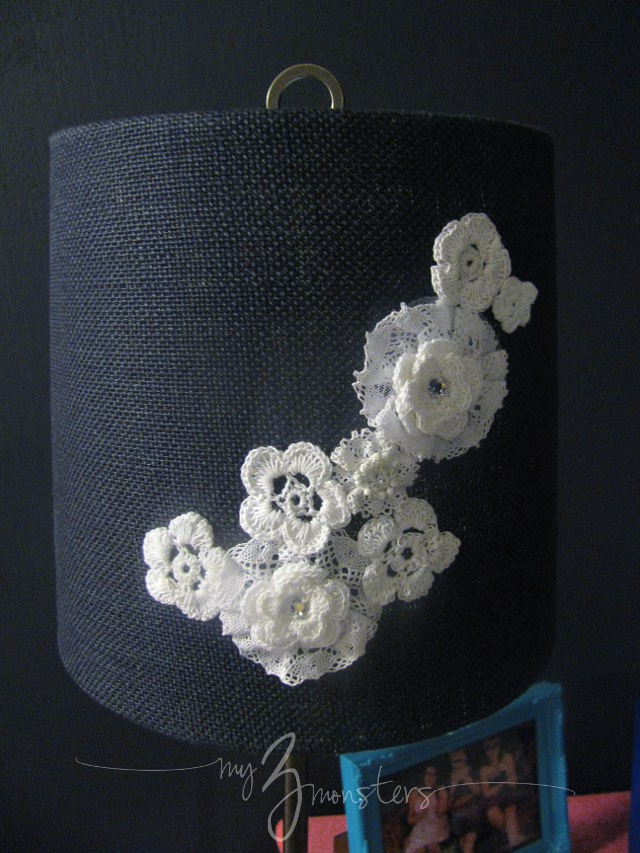
We added those cute crocheted flowers to a lampshade I had found on clearance months ago. Simple. It was fine, but it just wasn't . . . enough. It felt unfinished to me so today I'm taking a mulligan and giving you Flowered Lampshade v. 2.0. Sometimes you just have to rework things -- tweak a project here and there. I rushed into showing the lampshade yesterday because of my 31-day deadline, but I didn't love it.
I watch Project Runway and I am always horrified when they scrap a project after almost a full day's work and start from scratch, but usually it ends well. You can feel it in your bones when things aren't clicking. That was me yesterday. Tim Gunn would have told me, "Make it work!" and that's what I did today. I mean, I LOVE this lampshade now, but I'm not offended if you liked it better before. I'm a little nervous about showing it actually . . .
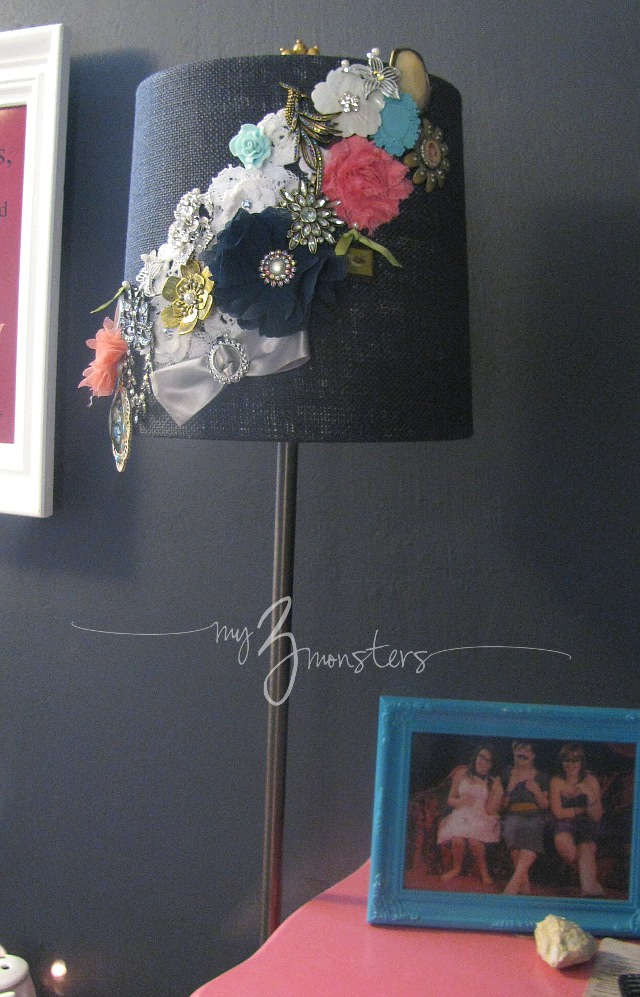
I dug through my jewelry box and pulled out all the vintage-looking brooches and pendants I have been collecting. I don't know why I have been collecting them --maybe because I'm a bit of a magpie. I've told you before -- I love things that sparkle! Whenever I find a cool vintag-y looking bauble at a thrift store or on the clearance rack at Michaels I can't resist buying it. Do I wear them? Not really. So I pinned them on the lamp shade.
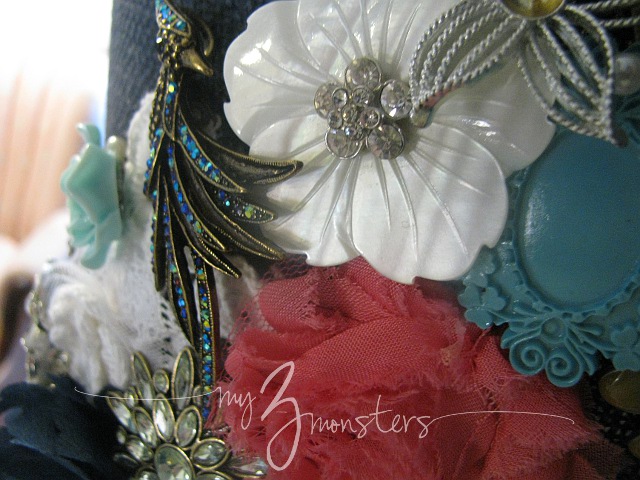
For the brooches I just slid the pin part in between the burlap of the lampshade and hard backing. I didn't puncture the shade because I wasn't sure I was going to like it. Also, don't worry about closing the pin. They are very secure in there between the two layers. To attach the pendants, I used pearl head pins stuck through the link at the top and inserted into the burlap like the brooches.
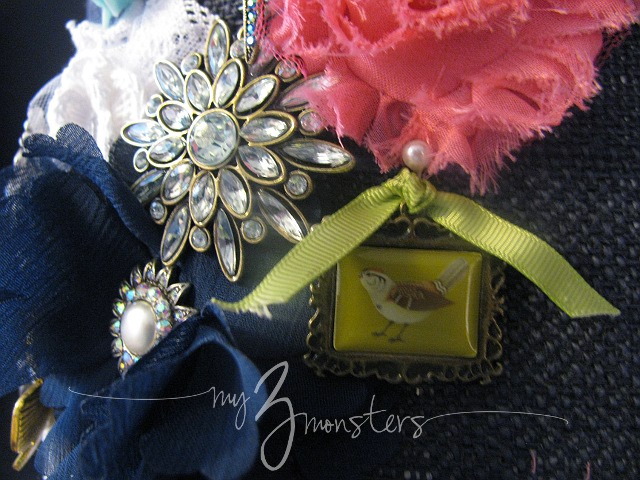
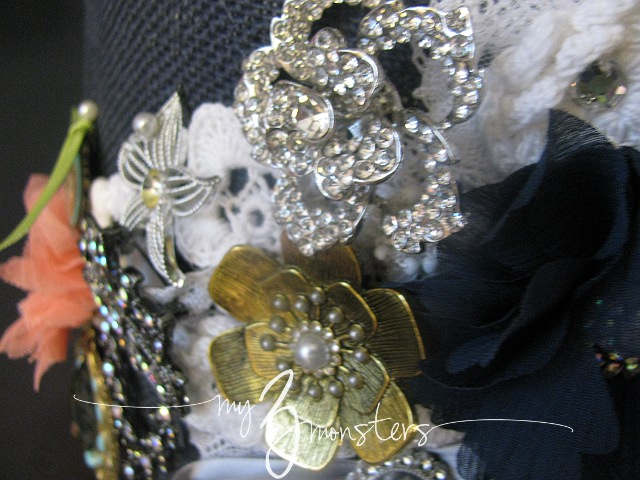
The bonus of doing it that way is that we can still wear the brooches and pendants if we want to. I hot-glued an earring to the finial of the lamp to finish it all off and now I ADORE this lampshade. What do you think {besides the fact that I should have cleared off the bed side table before taking this last picture}{and I need a better camera}?
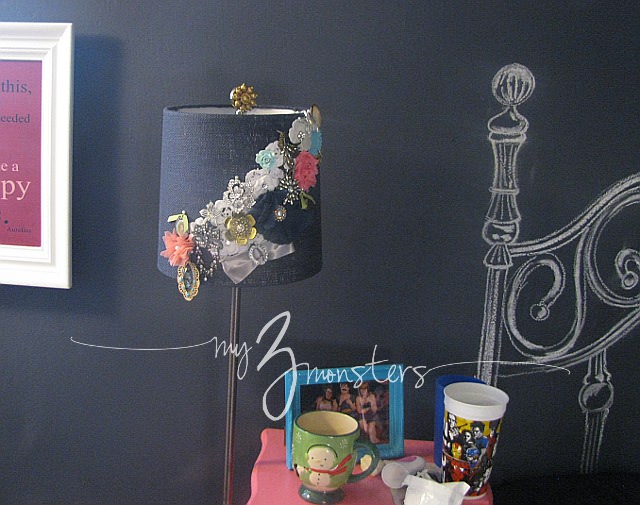
NOW it looks finished to me . . . and worthy of being in this classy grown-up-girl room. I promise tomorrow we'll start talking about slipcovers. Thanks for hanging in there with me all month! Have a great weekend, friends.


LOVE the 2.0. The first was cute, but this one seems to fit the room more. Love love love.
ReplyDeleteWow I loved the first lamp but the second!!!!! I would buy that in a minute!!!!!
ReplyDeleteAmazing work!!!!