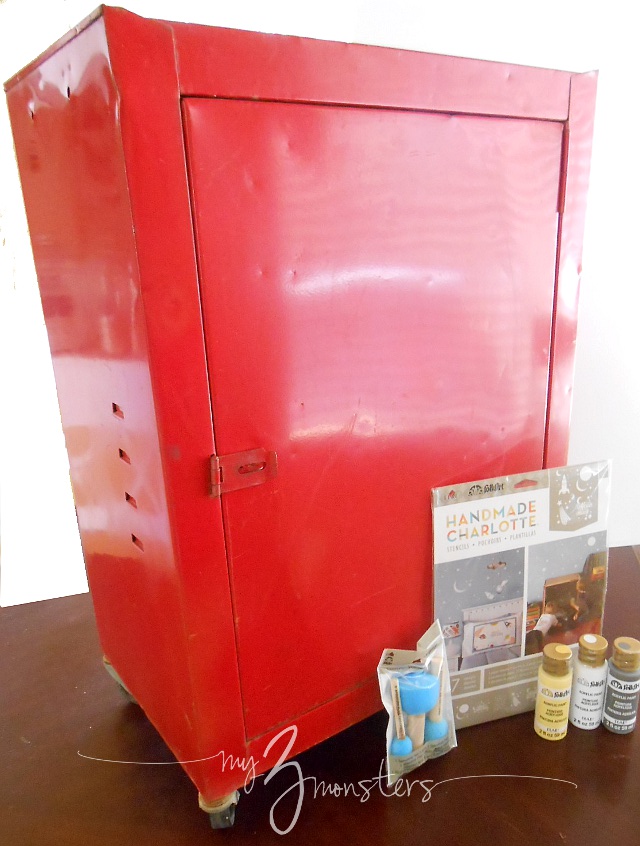
We found this really cool old tool chest at Goodwill a few months ago that I thought would be a fun addition to
our boys' vintage auto-shop bedroom. It was a little rusty and worse for the wear, but I kinda' dig that about it. And it was the perfect size for a bedside table so I snatched it up. It was just plain old red to begin with . . .
. . . which was
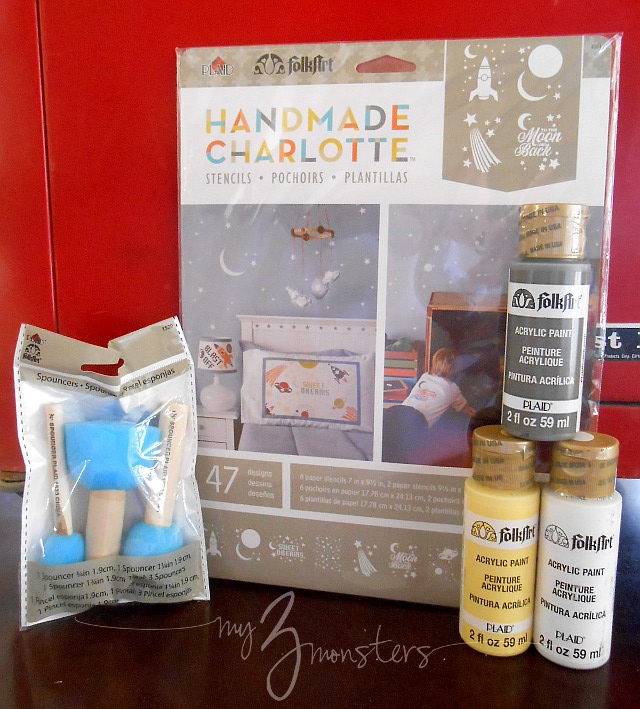
fine, but when I saw these great Handmade Charlotte stencils the wheels in my brain started spinning. What if I gave it a super-cool painted detail like a vintage race car?! Ohhhhh yah!
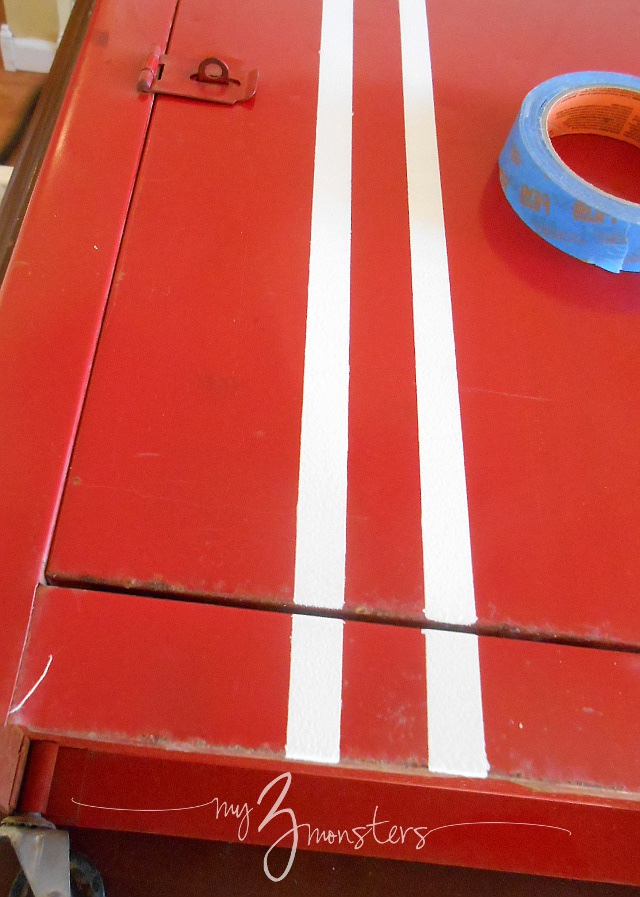
I started by taping off some stripes with masking tape and using my Folk Art acrylic paint in Wicker White to fill them in.
I wasn't too worried about having perfectly straight edges because . . .look at the rest of the chest. I carefully peeled off the tape while the paint was still wet so that the acrylic paint wouldn't peel off of the metal cabinet with the tape after it had dried. I'm not sure if that was absolutely necessary since the white paint seems pretty durable now that the whole thing is finished. You can't be too cautious, I guess. Now for the secret ingredient to give those crisp white stripes some weathered flair: Cinnamon.
Sprinkle a good coat of ground cinnamon on the wet paint wherever you want your rust spots to show. When the paint is completely dry, simply wipe the excess cinnamon away with a damp rag. Looking at the finished project I wish I had used a heavier hand when applying the cinnamon. I'm telling you - it is crazy cool. It looks just like rust when all is said and done.
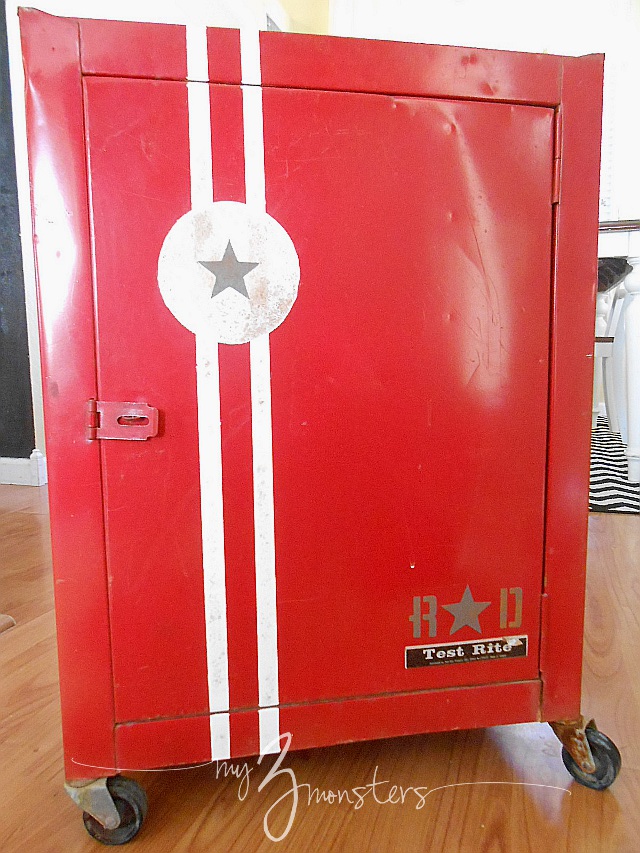
Once my stripes were dry I used one of my Handmade Charlotte stencils to make the big white circle.
I think this was supposed to be a full moon, but it was absolutely perfect for my vintage race car detail. I gave the circle a dusting of cinnamon while it was still wet, too. Once that was dry I used the biggest star stencil in the pack and some Folk Art Medium Gray acrylic paint to add a star in the center of the circle. As a little finishing touch, I stenciled my boys' initials in the lower corner as well using the alphabet stencils that came in the pack. I liked the retro look of the letters. It was perfect for the vibe I was going for. I sprinkled some more cinnamon and waited a few hours, then . . . . . . VOILA!

Retro tool chest perfection! My boys love the way it turned out and it fits so well in their room. Don't you love it when a project comes together like that? You could add a coat of spray sealer to make sure your paint is protected, but I really don't mind if the paint job gets banged up a bit so I left it alone. Plus, like I said, it seems to have adhered pretty well to the metal and doesn't want to scrape off easily. {Your results may vary.}
I wrote this post as part of a sponsored campaign with Plaid and The Blueprint Social. All opinions in this post are my own.


I LOVE that tool chest- what an awesome find! The stencils look great on it!
ReplyDeleteThis turned out awesome. I love the cinnamon trick! I've never seen that before. Great job.
ReplyDeleteCinnamon- thanks for the tip. Love how your stenciling turned out.
ReplyDeleteLove how this turned out. This is an awesome project! I hope you will consider linking it up to the Pinworthy Projects Party over at my blog, Just Us Four.
ReplyDeleteGreat idea! I have never heard of the cinnamon trick either - love!
ReplyDelete