My 3 Monsters: September 2012

Recent Posts

9.30.2012

{31 Days to a Brand New Room}


If you've read my blog for any length of time, I'd like to thank you, and you probably know that I have a passion for decorating on a budget.  I have a degree in interior design and I truly believe that every person should live in a space they love, no matter how much money they have to spend. I adore thrift store makeovers and big-name knock-offs and I either paint or slipcover almost everything that comes into my home. Don't let anything stand between you and a home you love to live in! 

Tomorrow I'll be kicking off a 31-day series all about decorating a room from the ground up, from conception to completion, with your own two hands and very little money.  I hope you'll join me on this little decorating adventure and that you'll find the information useful!

Here is a complete list of posts in the series:  {posts will be linked below as they go live}

Day29:  DIY Floor Mirror
Day30:  Sources/Finishing Touches
Day31:  The Finished Room

9.28.2012

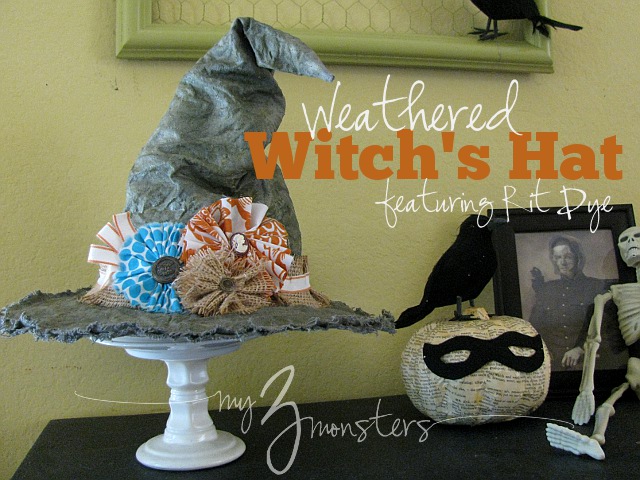
Weathered Witch's Hat
{featuring Rit Dye}


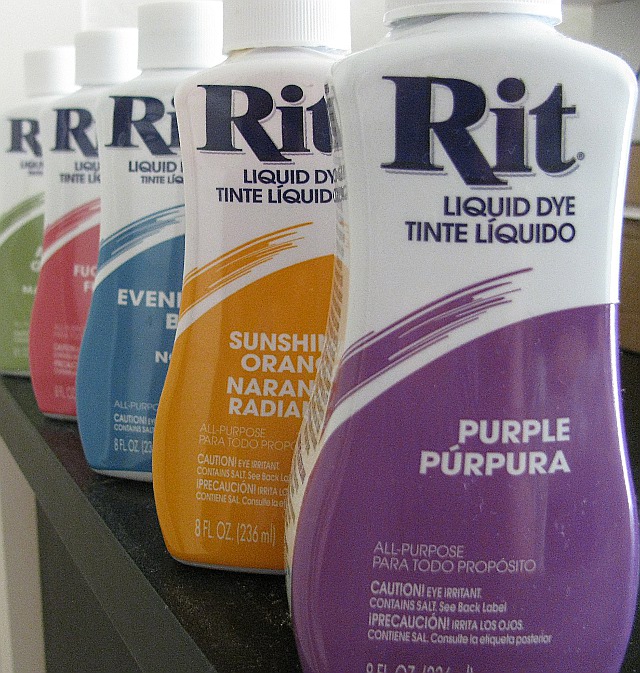
It's always fun to get a package in the mail, but when said package is filled with bottles of RIT Dye and a challenge to create a Halloween project it's even more fun.  

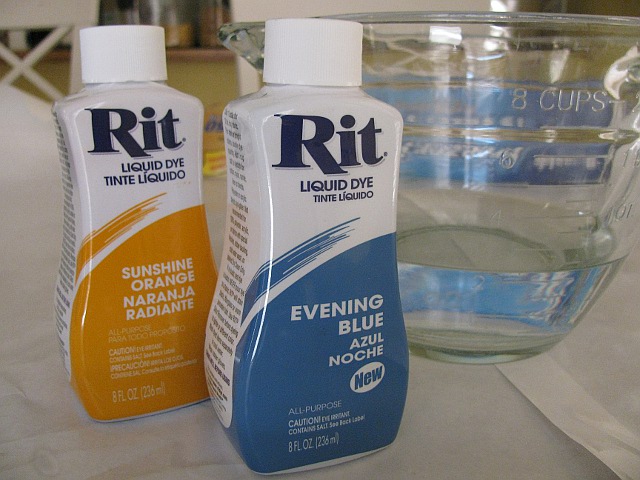
After tossing about a thousand ideas around for a day or fourteen, I decided I really wanted to make a cool witch's hat to add to my Halloween vignette. I didn't want to do a traditional black hat since I'm going with a gray, orange and turquoise color scheme this year.  Here's the coolest thing -- did you know that you can go on the RIT Dye website and find "recipes" to make over 500 custom colors?  I love that!!  So I picked a pretty shade of gray that I could mix up with the colors I had -- sunshine orange and evening blue. I recommend testing your color on a scrap of fabric to make sure you like it though, since all fabrics will take the dye a little differently.  The first color I used turned out a little bit too green so I added a little bit of black and it was perfect.  I'll share my recipe with you, but first you need to cut out your fabric.


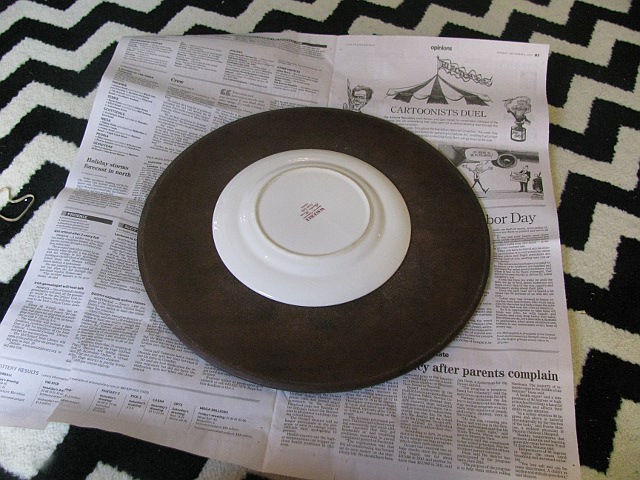
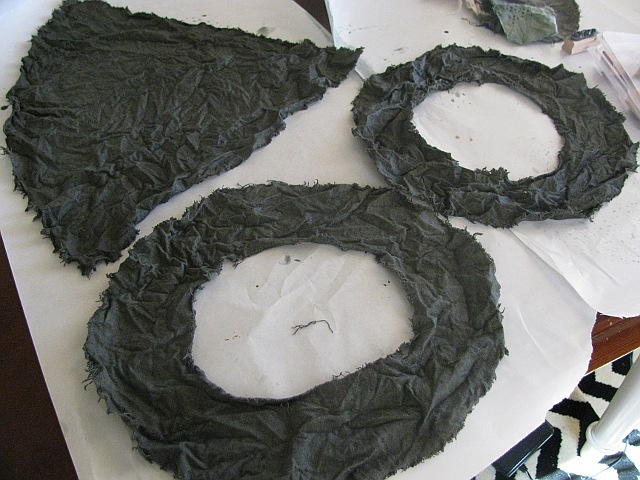
I drew up a pattern on newspaper using a couple of dishes that seemed like a good size -- one for the brim and one for the head hole.  {There's probably a better word for that.  Whatever.} Trace the larger circle first and cut it out, then place the smaller circle in the center and cut that out.  Try to get it as close to centered as possible so that your brim is the same width all the way around.

To make the pointy part of the hat you're going to have to do some math . . . stick with me . . .  Measure the diameter of your smaller plate.  Mine was about 8 inches across.  Add 1/2 inch for a seam allowance, so mine would be 8.5 inches.  Find the circumference of your plate by multiplying your diameter by 3.14.  {Remember πd from Geometry class?  Did you ever think you'd use that again?!}  For my pattern 8.5  x 3.14 = 26.69 inches.  Add 1 inch to that for seam allowances and round up to an easily measured number, so mine was 27.75 inches.  Then decide how tall you want your hat to be.  Mine was about 18 inches.  To make your pattern, lay out a sheet of news paper and draw a line 18 inches long.  Draw several more 18 inch lines radiating from the top point of your first line, until you have a distance of 27.75 inches across the bottom edge.  That's about as clear as mud, huh?  I drew a little diagram below that I hope is helpful.

Cut your patterns out of your fabric -- one of the pointy pieces and 2 of your brim pieces.  I had an old painter's drop cloth laying around so I decided to use that.  Next, you need to mix up your dye.  Cover your work surface so nothing gets ruined in the process.  Here's the recipe for the color I used:
2 C. hot water
2 tsp. Evening Blue dye
1 tsp.  Sunshine Orange dye
1 tsp. Black dye


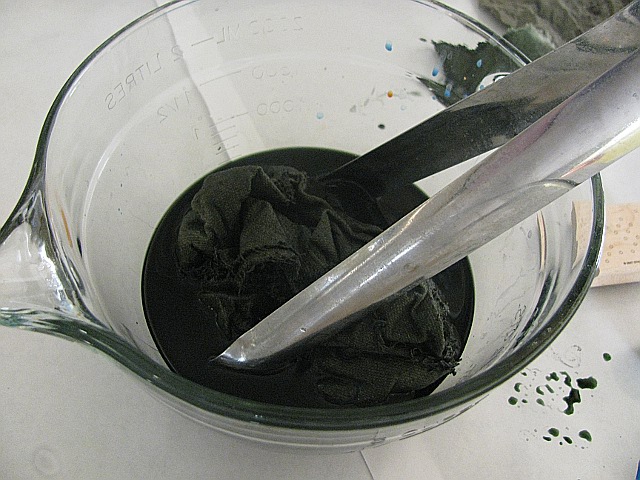
The key is to use VERY hot water.  You'll get way better results if you do.  I wet my fabric in the sink before dunking it into the dye.  I wanted a mottled look rather than even color, so I wadded up the fabric before I dunked it.  

After a few minutes I took the fabric out, wadded it differently and put it back in the dye bath.  After about 5 minutes I liked the color so I took it out and rinsed it until the water ran clear and laid the fabric out to dry. 


See how the wadding made it all rumply?  I love that.  You can't really see in the picture here, but the color is darker in some places and lighter in others.  That became more obvious as the fabric dried.

To sew it up, first stack the two brim pieces on top of each other and stitch around the outside 1/4 inch from the edge.  That will give you the fun ragged edge on the brim of your finished hat.

 Take your pointed piece and sew the two straight 18 inch edges together with a 1/2 in seam.  Turn it right side out and you'll have a big cone.  Pin the bottom edge of your cone to the inside circle of the brim and sew around with a 1/2 inch seam.  Turn your seam allowance up {into the cone of the hat} and top stitch around to hold it in place.

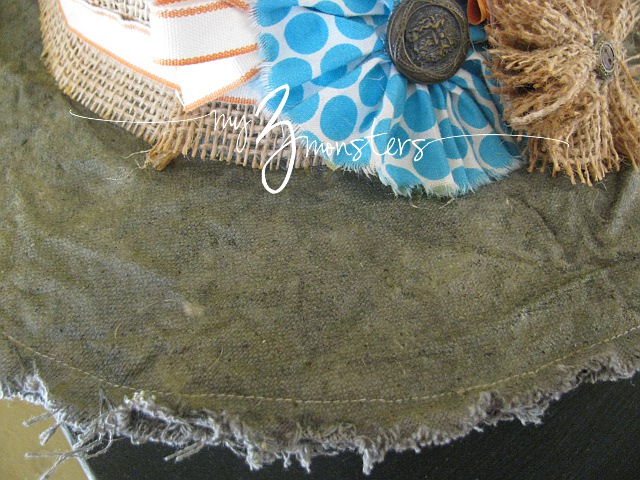
The hat is basically finished at this point.  I wanted it to hold its shape for my display so I stuffed it with dish towels, shaped it how I liked, then painted on a couple coats of Mod Podge to stiffen it up.  {I used Antique Mod Podge which made my gray color a little more yellow.}


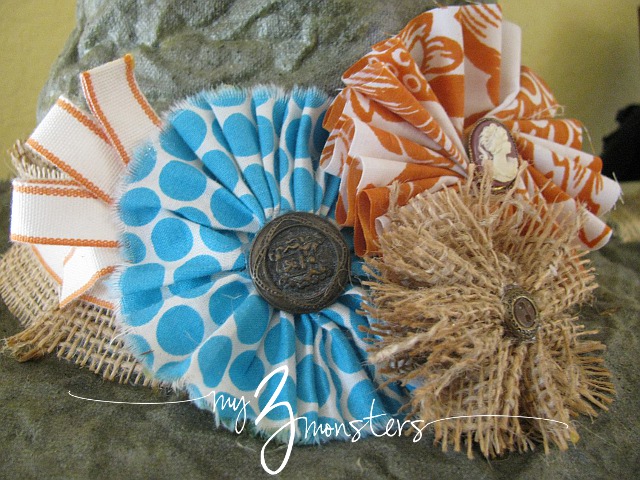
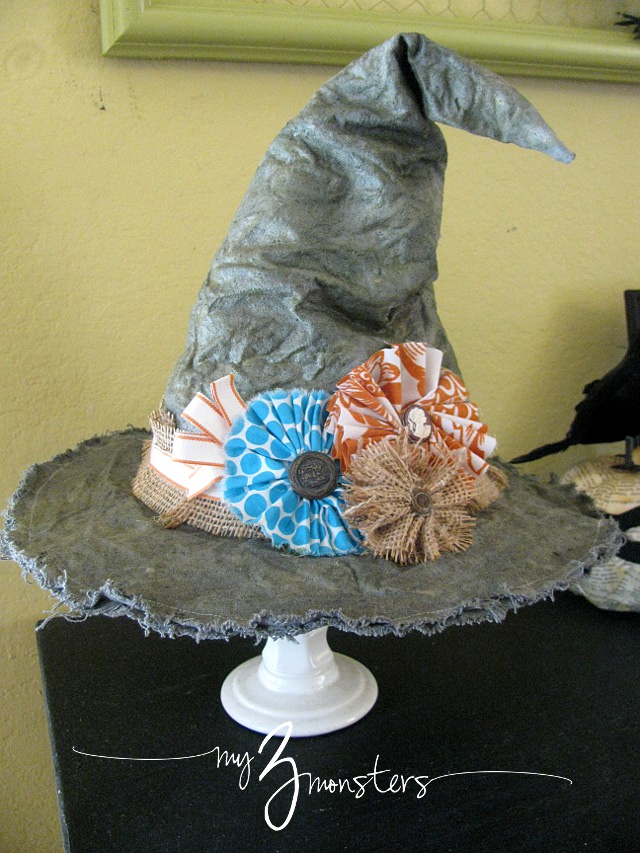
Once it's dry, unstuff it and add your embellishments.  I hot glued a band of burlap around the base of the hat with a band of ribbon on top of that.  Throw on a few fabric flowers and vintage buttons and you're good to go!

 Sitting on a little pedestal, I think it adds just the right touch to my vintage-y Halloween display.  Thank you to RIT Dye for giving me this challenge!!  I liked the dye so much that you will be seeing more of it in some projects in the near future.

I wrote this post as part of a paid campaign with RIT Dye and Blueprint Social.  The opinions in this post are my own.


9.26.2012

My Vintage Inspired Halloween Garland
{and a new chalkboard design, too!}

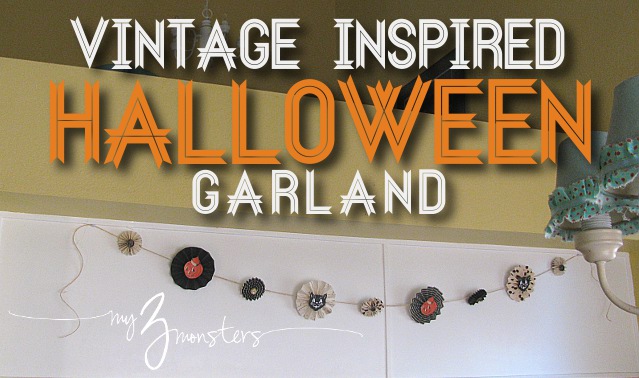
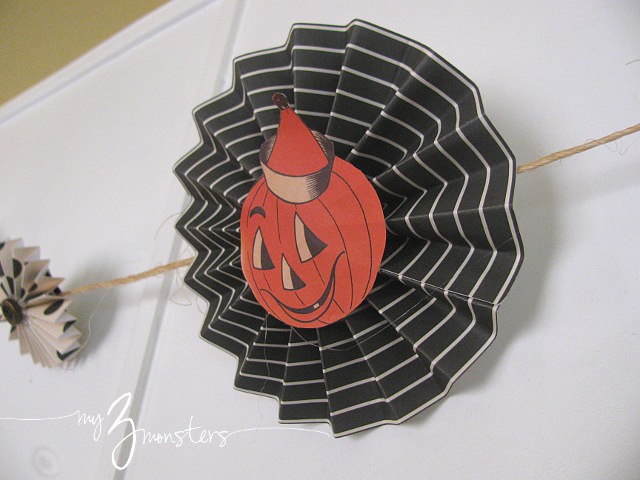
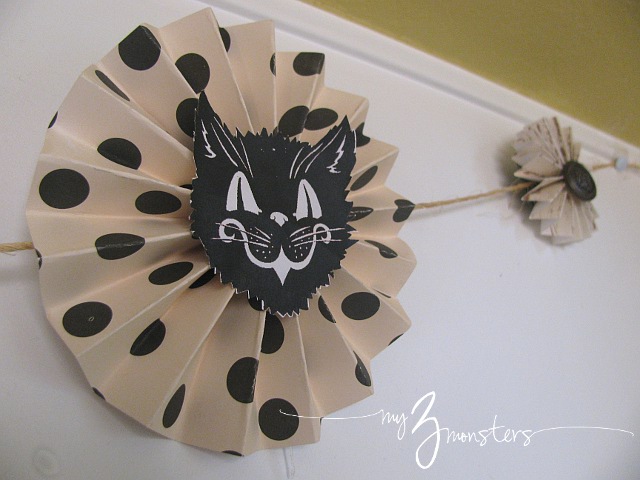
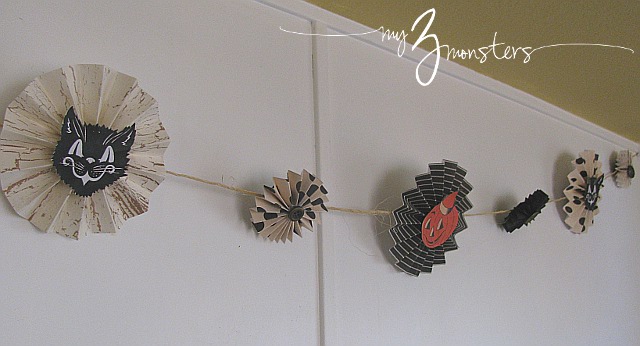
Today I wanted to show you this super cute vintage-y looking Halloween garland I made for my dining room.  We have a bank of cabinets separating our kitchen and dining room and I have always hated seeing the empty back of the upper cabinets in the dining room.  I've been toying around with ideas for that area for years and have never been able to settle on a permanent solution.  My current preference is to attach chicken wire across there and frame it out with molding so I could clip up pictures or Christmas cards or whatever strikes my fancy.  Since that hasn't happened yet, I decided to jazz it up with a cute garland for now.

I got my inspiration from this tutorial shared by Lil' Luna on Eighteen25 way back in 2010.  Basically, you just need a few sheets of cool scrapbook paper {I went with a black and white theme for mine}, some decorative buttons, twine and hot glue.

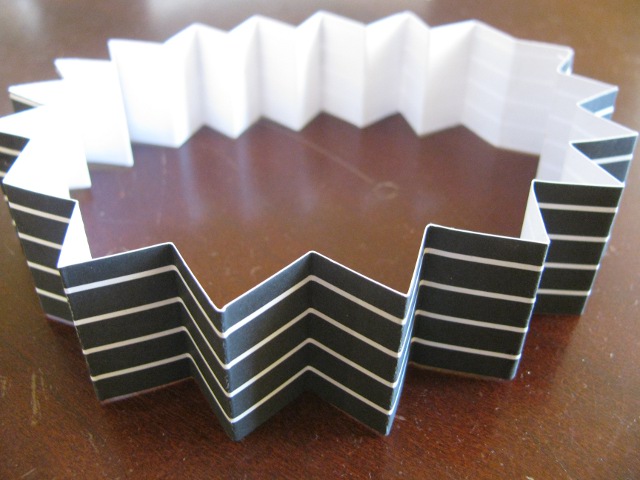
Start by cutting your paper into strips anywhere from 1-inch to 2.5-inches wide.  The wider the strip, the bigger your accordion "flower" will be.  You'll need two strips of paper per flower.  Fold each strip back and forth to create a long accordion.  No need to be exact -- just eyeball it.  I think my folds were about a half an inch apart, more or less.  Attach your two accordion pieces end to end to for a large ring, like so:


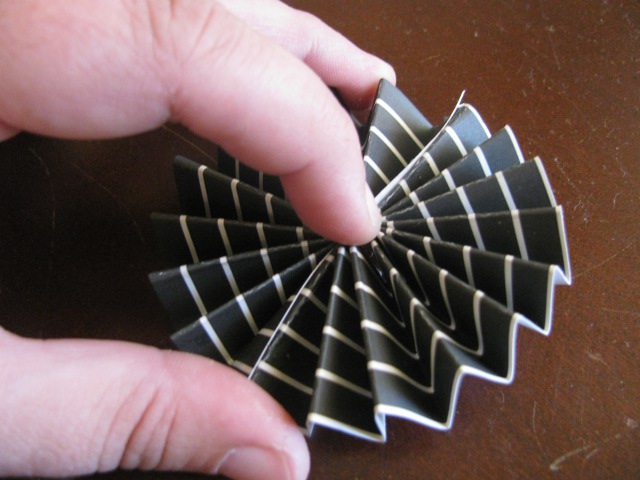
Then, the tricky part!  Flatten your ring into a flower by bringing the top edge into the center, like so:

Put a dab of hot glue in the center and hold it until it stays together.  When you have all your accordion flowers made, you can embellish embellish them with vintage style Halloween printables and buttons.


I attached a flower to my twine every 8 inches.  Just cut a small circle of matching paper and hot glue it to the back of the flower, sandwiching the twine in between.  Leave some extra twine on each end {about 18-24 inches} so you have a cute curling tail effect on each end.  Easy Cheesy!  I like the festive feel it gives an otherwise boring space.


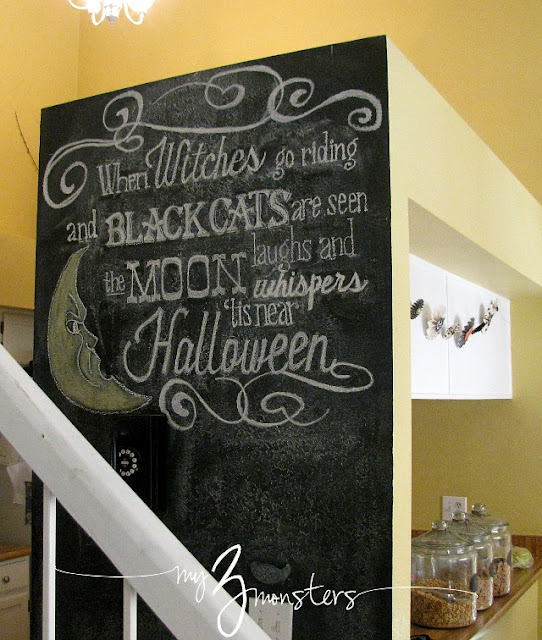
On a whim last night, I decided to switch up my chalkboard wall to make it more Hallween-y, too.  Thanks to Ella Claire for the word art template!!


It's far from perfect since I free-handed it, but it's fun and fresh.  {Here's what it looked like before.}Happy Halloween decorating, friends!


9.23.2012

The View from the Blacklist

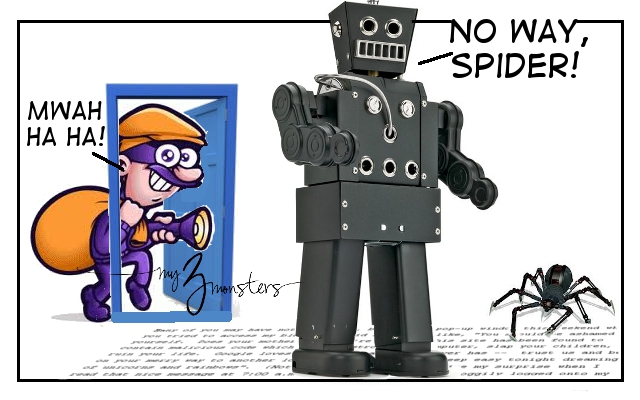
An extremely accurate artistic depiction of what I think is happening behind the scenes of my blog.
Many of you may have noticed a fun, bright red pop-up window this weekend when you tried to access my blog.  It said something like, "You should be ashamed of yourself.  Does your mother know you're here?!  This site has been found to contain malicious code which could destroy your computer, slap your children, and ruin your life.  Google loves you more than Amy G. ever has --  trust us and be on your merry way to another lovely site so you can sleep easy tonight dreaming of unicorns and rainbows".  {Not a direct quote.}  Imagine my surprise when I read that nice message at 7:00 a.m. Friday morning as I groggily logged onto my computer.  My site -- my little internet baby -- had been taken into custody for its unbecoming behavior.  I was equal parts shocked, confused and embarrassed, with a dash of angry thrown in for good measure.  My 3 Monsters?  On the Blacklist?  Huh?

I'm just a little old Mormon homemaker sitting here in Arizona writing about crafts and other very vanilla, non-controversial things.  {Except for that post on Housekeeping.  My views on that proved to be quite controversial.}  How had I unwittingly become accomplice to internet crimes against humanity?  Could it be true?  And, more to the point, why me?  Because I'm an easy target.  I could never have imagined this happening so I didn't protect myself against it.  After a quick web search, I learned that my website had probably been hacked and that malicious code had been placed somewhere in the depths of my blog-baby's soul.  And that it moved around so I wouldn't be able to find it, even though Google could.  After an extensive web search, I learned that I was in waaayyyy over my head.  There was talk about robots, and needing to "close the back door" of my blog and looking in my directories for redirect code.  Whaaaa?  Google has spiders crawling through my blog content and there are robots keeping the spiders from crawling in certain places?  Meanwhile, burglars are sneaking in and leaving junk all around.  Why can't the robots fight the burglars instead of the spiders, which seem harmless after all?  {If you know about this kind of thing you are probably sitting back saying, "That girl is an idiot,"  and you're right.  But can you make a snowman out of a baby sock?  Didn't think so.}

Long story short, I got it fixed and it probably won't happen again because I am paying a company now to monitor my back door.  Or something like that.  I'm not sure exactly what I'm paying them for now, but they fixed my blog so I love them.  I'd like to sincerely apologize to anyone whose website or computer may have been adversely affected by the things that happened to my blog this weekend.  Not that I did anything on purpose, but I feel really bad nonetheless.  I got an email Friday night from another nice blogger whose site had been blacklisted, too, because she linked to me in her side bar.  She was super sweet and super encouraging, but I lost her as a follower.  And I lost all of my nearly 1100 readers in Feedburner.  Boo.

It's not a big deal, really, except that it is.  To me it's a big deal.  When my kids are at school or sleeping, this blog gets the lion's share of my attention.  It's my job.  It's what I do.  As a very reserved girl in real life, this blog is my voice.  It's where I'm not afraid to be myself.  I feel very motherly toward it, in a weird way.  I felt sick to have my blog-baby attacked and our good online reputation taken away from us this weekend.  I was sick to think that anyone else would have to go through a similar experience, just because they were associated with me in some way.

So, I'm sorry.  And thank you for coming back.  And now I'm moving on. 

*UPDATE:  I have found out that the "bad stuff" Google found was associated with the ads I run -- an issue with the mother company -- and not a direct hack of my blog.  It has happened to many, many bloggers this weekend, too.   It gives me comfort to know that my blog-baby is safe and sound and that the ad company {with waaayyy more resources than me} has amped up their security to protect me {and you!}from their end.  It still sucks, but at least you got to see the cool graphic I created.*


9.15.2012

Just Dance Just Sweat Drean Team Update

Thank you to Ubisoft for picking me to be a member of the Just Sweat Dream Team and sponsoring this fitness series. Please click here to learn more about Ubisoft. I was selected for this sponsorship by the Clever Girls Collective. All opinions are my own. 

Hi guys!! We're back again with a video diary about our Just Dance experienced this month.  First, just watch this painfully bad video:


Gah! I hate those videos.  Do they intentionally freeze frame at the most unattractive point for the preview image on those things?!  Whatever.  As I said {so eloquently}in the video, this past month has been a struggle with staying motivated and staying on the right path EVEN WHEN you are not losing the weight.  That's not entirely true -- I've lost two more pounds this month.  It's progress.  Painfully, painfully SLOW progress.  Honestly, it's hard.  We're living in a society of instant gratification -- fast food, high speed internet, cell phones -- we want everything RIGHT NOW.  I feel like I should weigh less every single time I step on the scale.  That hasn't been the case, obviously, but I'm pleased that the weight I have lost is staying off.  I don't really have as much fluctuation in my weight as I used to, AND I'm not gaining for the first time in the past few years.  That's something . . .

We've really had to learn to measure success by a different standard and be happy with that.  For me, and maybe for lots of people, entering into a new pattern of healthy eating {I hate the word diet} or working out is done for the sole purpose of losing weight.  I fixate on that number on the scale and lower numbers = success.  I've found through this Just Dance Just Sweat Dream Team process that when I focus ONLY on my weight, I tend to miss the other really great things that are happening as a result.  I have so much more energy all day long and I am sleeping like a baby at night.  It's been years since I've consistently gotten a good night's sleep.  That's something . . . We can both work out longer and more intensely than we could two months ago.  That's something . . . I don't crave fast food, like at all.  We've done drive-thru dinners a couple of times, but it's been because we were super busy those days, not because I just really wanted it. That's also something . . . My jeans are too big for me now.  That's a BIG something. 

So, there has been progress and success.  We love using Just Dance as a part of our fitness routine.  Dancing is so much more fun than running for me so I look forward to doing it.  Anyway, that's it for another month.  We'll be back in October with our final results!  See what the other team members are up to here.

9.13.2012

Black Hat Society
{Vintage Witch Free Printable}

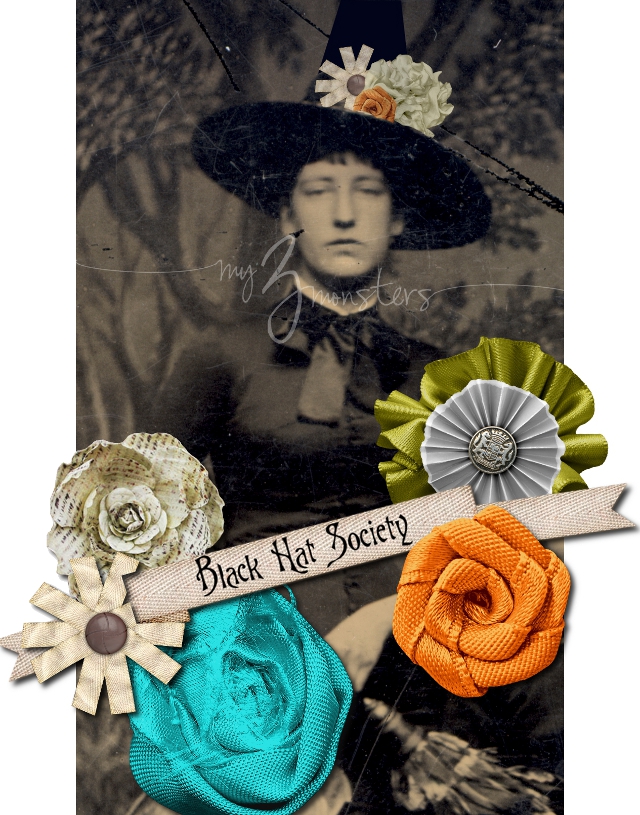
I found a vintage stock photo online a while back and thought it would be perfect to use for Halloween if I doctored it up a bit.  I like that it tied in so perfectly with the holographic image I framed earlier this week.


The image wasn't wide enough to fit a traditional print size and I didn't want to crop any of the height off to make it fit.  My solution was to put the narrow image onto an 11X14 print, with a white border on each side that I would cut off later.  Then I decided to add some decorative elements to make it more interesting and have those elements hanging off the edge of the image.  When I had it printed and cut it out it really looked like the elements were real -- almost 3 dimensional.


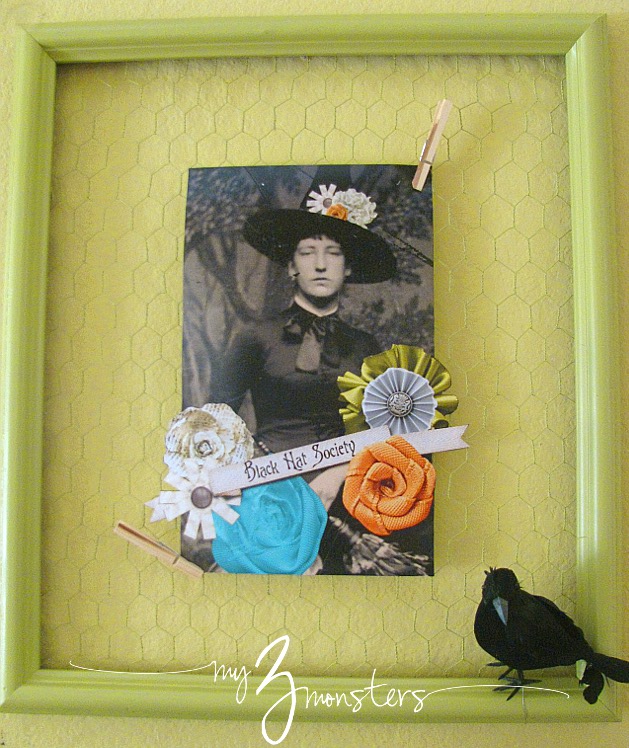
Since the cut-out image was an odd size I knew I needed a creative way to frame and display it.  I took this old 16X20 frame that I had and stapled chicken wire to the back of it then spray painted the whole thing apple green.  Chicken wire is inexpensive and easy to work with.  I don't have any special tools -- just a pair of wire cutters and this whole thing only took about 30 minutes, start to finish.  Easy!  I'll have a more detailed tutorial for making the frame next month if you're interested, but it's pretty self-explanatory.
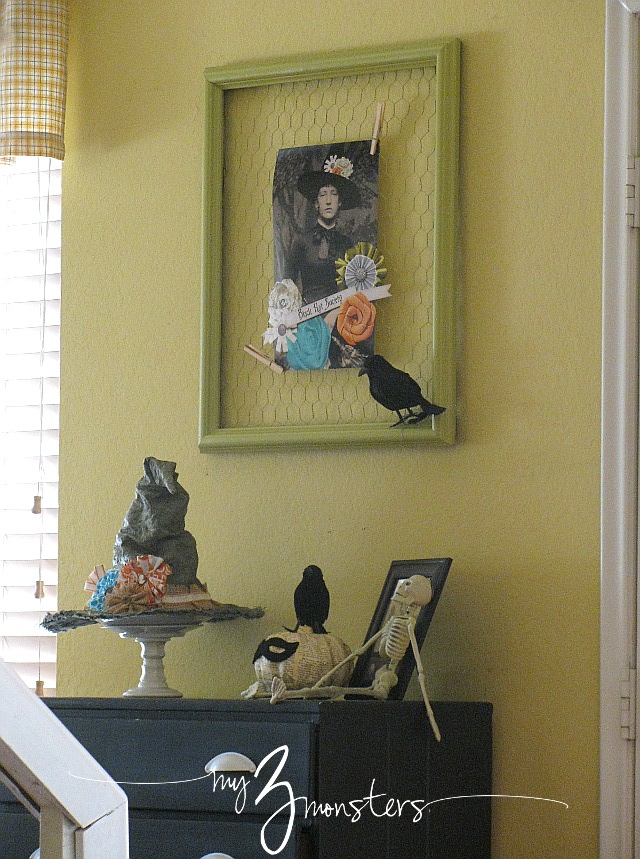
I hung the frame onto the wall and used clothes pins to attach my witch image to the chicken wire.  I added a little black crow to the bottom edge of the frame by twisting the wires on its feet around the frame and chicken wire.  I think she's a fun little addition to my vintage Halloween display.  {The tutorial for the witch's hat in the display will be coming in a couple of weeks!}


I have posted this vintage witch image {without the watermark}for download on the My 3 Monsters facebook page so she can grace your Halloween festivities, too.  You'll have to like the page in order to see the "Exclusive Downloads" button.  Once you click that button, you'll have access to this and several other exclusive printable downloads for My 3 Monsters fans.

Download and save the image to your computer then have it printed at any photo-processing site.  Costco is my favorite because they do a good, quick job and they're really cheap, but places like Snapfish would also work.  Once you get your print, simply cut off the white border on each side and you're good to go!

Thanks for stopping by today.  I hope your week has been fantastic!


Lil\'LunaThe 36th AVENUE

9.11.2012

Decorative Pumpkins for Fall
or Almost-Fall

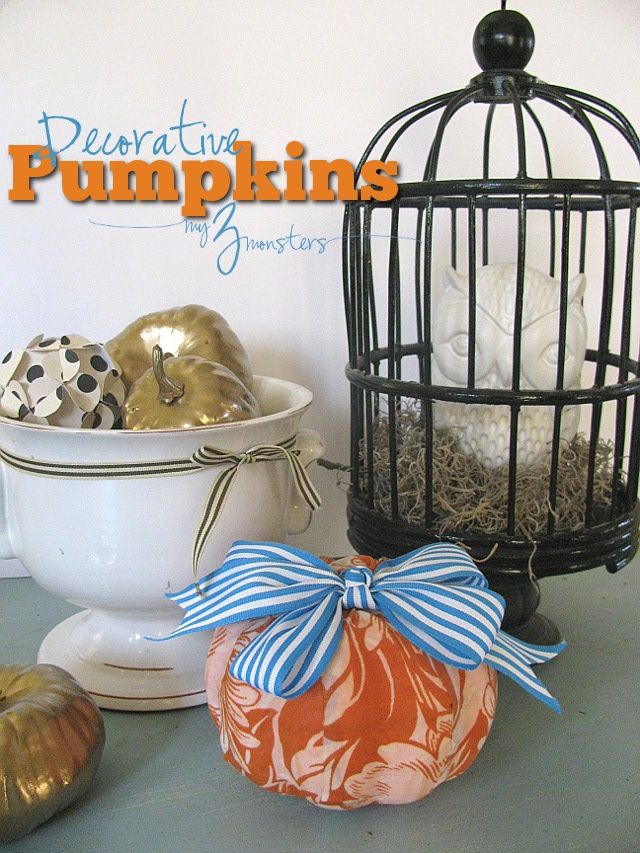
As I said yesterday, I love fall.  I'm ready for fall to be here.  Like, now.  So I'm hauling out the fall decor in my home, hoping to create what does not yet exist where I live.  Even though "Fall" and "Halloween" are pretty distinct ideas in the decor world, I have always tried to merge the two, opting for the more generic pumpkins that can last from September all the way through Thanksgiving.  In fact, I usually get about as generic as you can get and use white pumpkins.  There's just something about white pumpkins for me -- they're so classy and timeless.  This year, however, I found some awesome orange Anthropologie pillow covers on clearance for dirt cheap and some vintage fabric on Etsy in a pretty orange print so I decided to get a little colorful.  It's the perfect timing since I'm finally slipcovering my red couches in gray canvas.  Orange + red = yuck {to my eyes}, but orange + gray = fresh and pretty.  Especially with some turquoise, lime green, and gold accents tied in.  Still not convinced?  Let me show you a couple things I've been working on.

Book Page Pumpkins


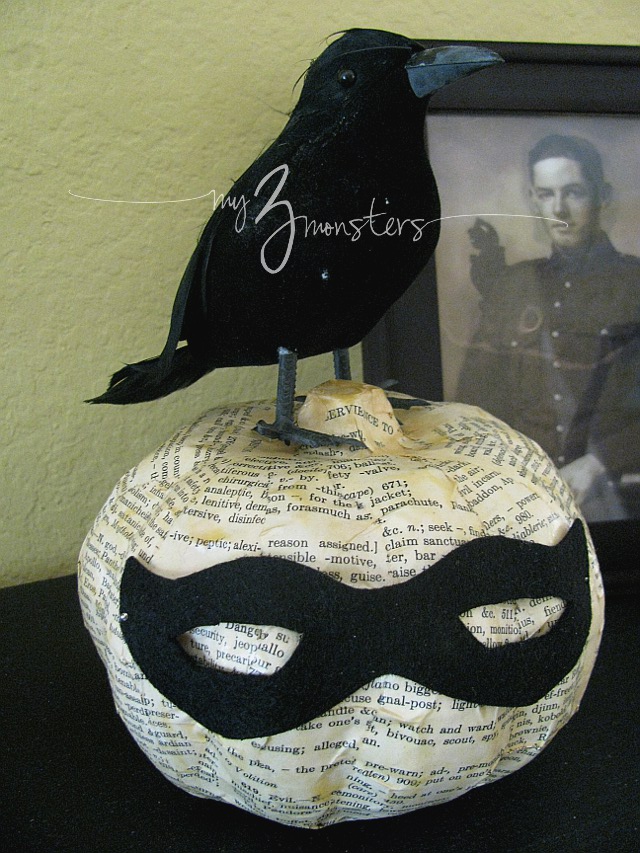
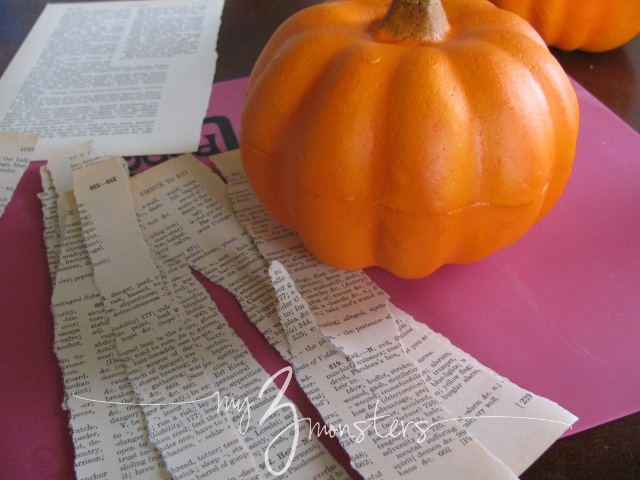
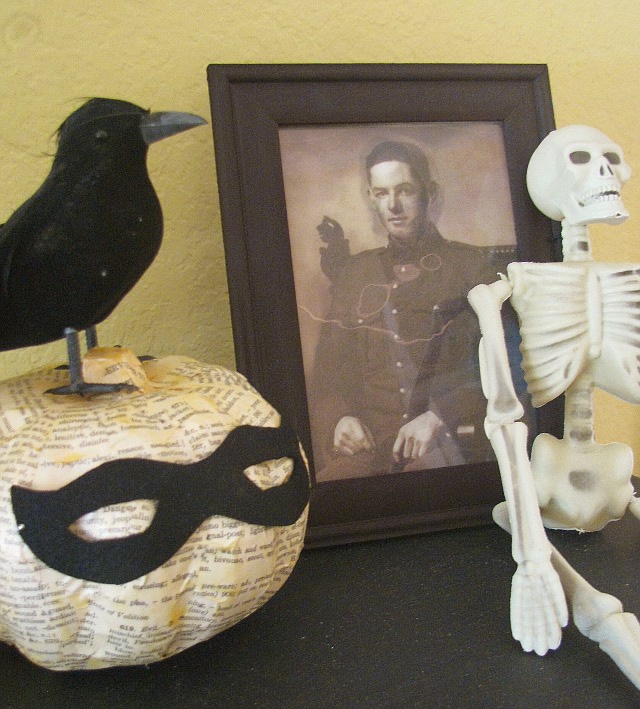
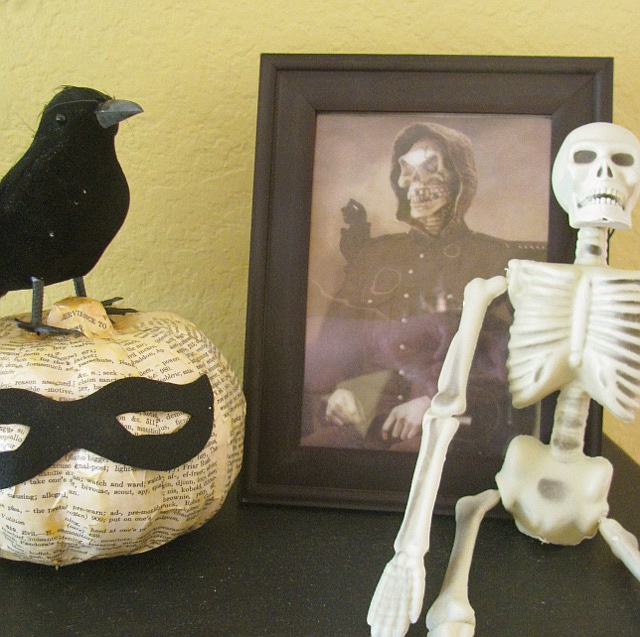
These are the most Halloween-specific of all the pumpkins I've made this year because of the eye mask. Once Halloween is past, I can just unpin the mask, remove the crow and have a more timeless pumpkin.  To make these, I just went to my dollar store and picked up several 6-inch pumpkins.  I had a vintage dictionary in my stash from another project, so I went through and tore out pages with words like danger, poison, wicked, and ghoul on them.  You have to look real close at the finished product to notice that, but I like the idea of it anyway.  Once I had torn out 5 or 6 pages, I tore each page into strips.


Working in small sections, I used Mod Podge to attach the strips of paper to my pumpkin.  First brush on some Mod Podge then press a strip of paper onto the pumpkin.  Use your fingers to get the paper to bend into all the creases then apply another coat of Mod Podge on top of the paper.  Work your way around the whole pumpkin making sure not to leave any gaps.  I used the Antique Mat Mod Podge to enhance the vintage feel of my dictionary pages.  Once the Pumpkin was dry I cut a little mask out of black felt and attached it with straight pins poked right into the foam pumpkin.  I wanted to be able to remove it later, but if you don't care about that, you could hot glue it on.  I also used a straight pin to poke two holes in the top of the pumpkin for the wires on the feet of my crow to go down into so that I could take him off, too, if I wanted -- for storage or whatever.  I love the way this little guy turned out.  I think it might be my favorite of all the pumpkins I've made this year.

Vintage Fabric Pumpkins


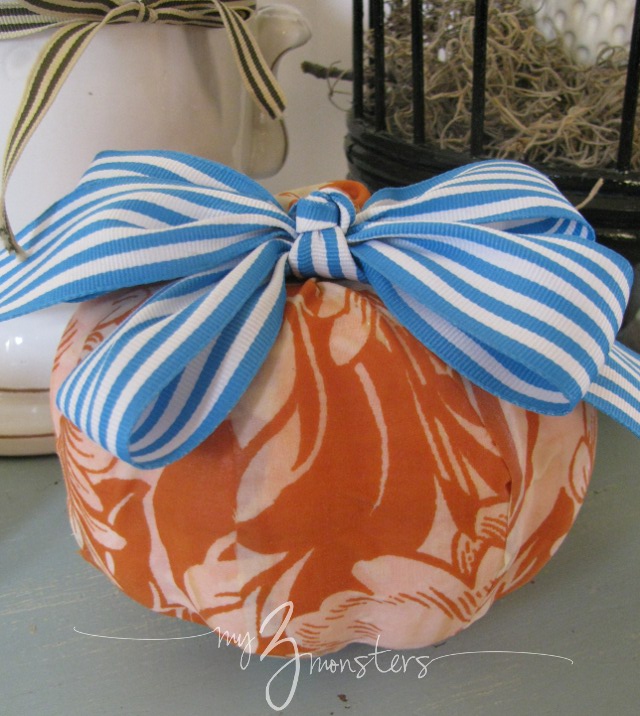
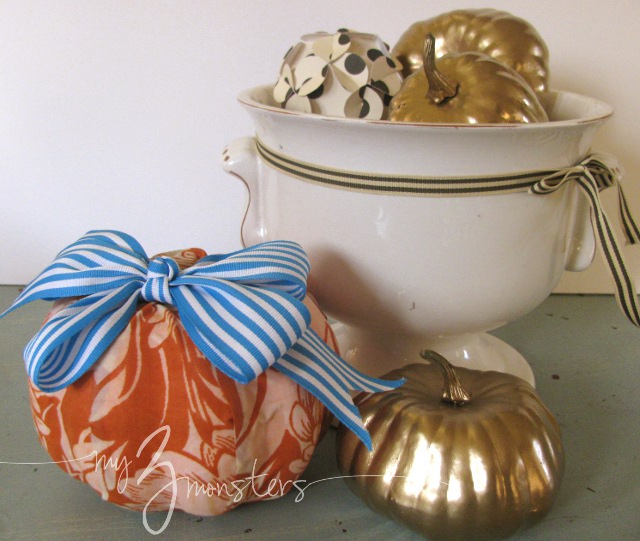
These ones were made exactly like the book page pumpkins, except I cut fabric into strips instead of tearing paper.  Working with one strip at a time, I Mod Podged the fabric all the way around the pumpkin.  You can kind-of stretch and pleat the fabric as you go to get good coverage.  To finish it off, I tied a big grosgrain ribbon bow and attached it with straight pins.  I don't know why I'm so fickle . . . I always think I may want to change things up later so I try really hard to leave myself that option.  For instance, A black and white striped bow would be really cute for Halloween and then you could switch to another color for the rest of the season.  I just like to have options.

Metallic Gold Mini-Pumpkins


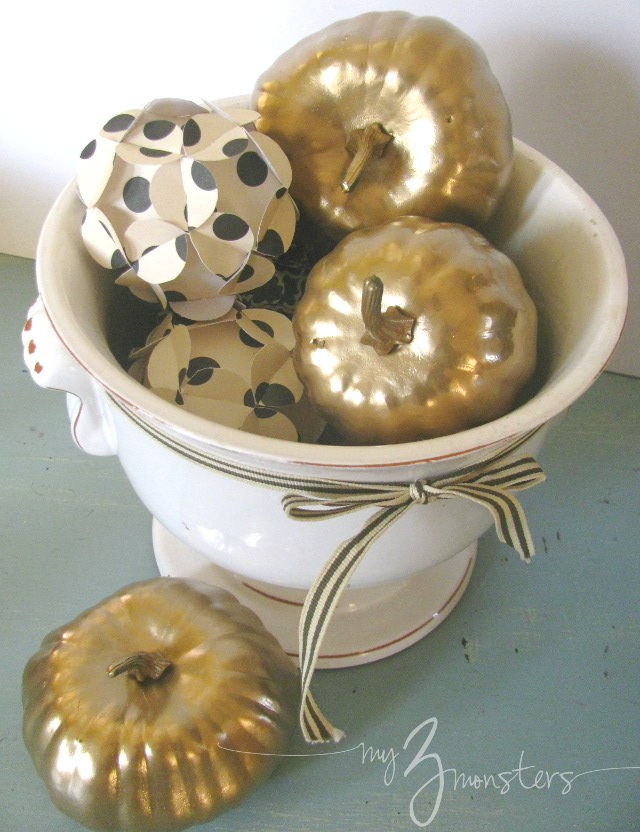
These last ones are no-brainers.  I bout a few mini-pumpkins at the dollar store and sprayed them with metallic gold spray paint that I had in my craft closet.  They're the perfect size to use in a decorative bowl or vase as a centerpiece on your dining or coffee table.  I mixed mine with some decorative paper balls to keep it interesting.  Gold has fallen out of favor for the past decade or so, but I feel like it's making a comeback.  Maybe I'm wrong, but I'm kinda' liking it again anyway.  I love the way my gold mini-pumpkins look with the vintage orange ones, too.


I'm still going to pull out my white pumpkins this year, but I love these colorful additions for a change.  Stop by tomorrow for a Just Sweat Dream Team update from me and Brent.  {I hate those embarrassing video diaries . . . } Later in the week I'll be sharing another Halloween project with a free printable.  I hope you'll come back!

Lil\'LunaThe 36th AVENUE

9.10.2012

The $2, 5-Minute Halloween Craft Project

I'm just going to pretend like fall has arrived here in the desert, mmmkay?  It has been a long, hot summer {what's new} and I'm done with it.  Even though it's still hot and will probably continue to be until Halloween,  as far as I'm concerned, it is over.  Summer, my dear, you have overstayed your welcome yet again.  It's time to pack up your things -- all your swim suits and bright colors -- and hit the road.  Don't let the door hit 'ya on your way out.

I have always loved fall with it's refreshing cooler air and pumpkin-y baked goods.  I was born in October so I feel like this is MY time and it can't ever come soon enough.  I spent the weekend cleaning up my house -- a good fall cleaning is just as refreshing as a spring one.  While I was at it, I packed up some of my summery decor and put out some new stuff that I have been making.  I realize that Halloween is still a good six weeks away, but I put some of that stuff out, too, since I had to stage a photo for something I am working on for Rit dye.

I usually steer clear of Halloween decorations because they can be so cheap and cheesy looking, but today I'm going to share with you one of the most inexpensive, easiest Halloween craft projects you will ever find. It has some major creep factor without being in-your-face yucky, kinda' like the Haunted Mansion at Disneyland.  I love that ride.

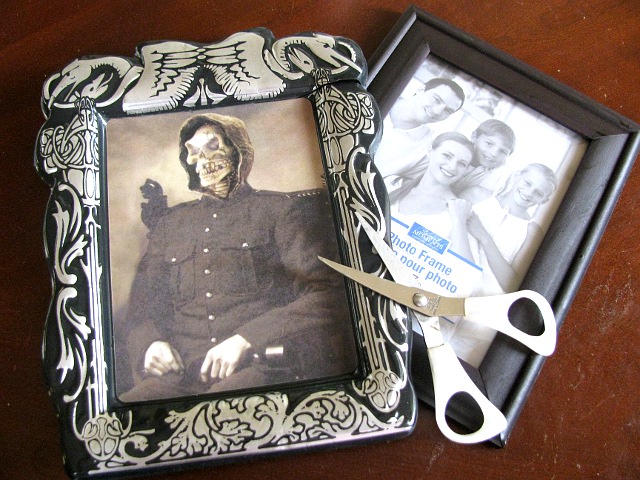
As I was walking around the dollar store the other day I saw this plastic holographic picture frame:

 I knew my boys would get a kick out of the picture in the middle, but that ugly molded plastic frame is everything that is wrong with Halloween decorations.  After a brief internal debate, I decided I could cut the picture out and pop it in a nicer frame and it would probably look pretty cool.  I think it turned out better than I had hoped.


 From one angle it's just an old photo of an unassuming Cival War soldier, but take two steps to the right and . . .


. . . it's Grim Reaper time!  Granted it's not elaborate or ground breaking, but EVERYONE comments on how cool it is.  Even my husband, who just barely tolerates my need to display cutesy seasonal items, thinks this one is 'da bomb.  {He doesn't really talk all gangsta like that, thank goodness, but he does really like this picture.}

There you have it.  For two bucks {just one if you already have the 5X7 frame} and about five minutes of your time you can make a really cool Halloween showpiece.  Come back tomorrow to see a couple of fun ways to decorate pumpkins.  Have a great day, friends!


Lil\'LunaThe 36th AVENUE

9.09.2012

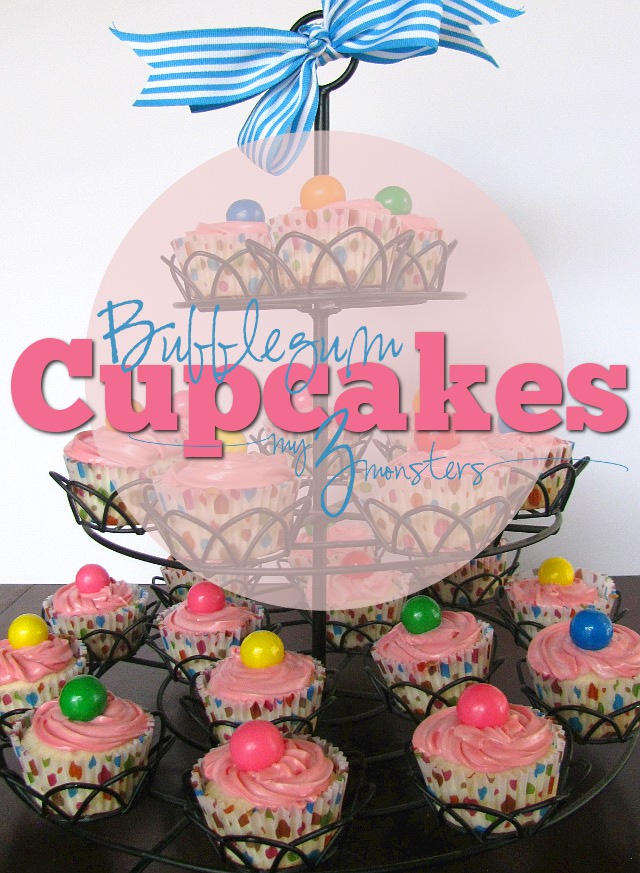
Yummy Bubblegum Cupcakes


Sis and I made these super-cute cupcakes for a church activity last night and they were a huge hit with the twelve-and-under crowd.  I thought they were delicious and I think the adults would have liked them, too, if they had the chance to try them.  Kids are quick getting to the buffet table, y'all. 

I've been looking at the new Flavor Creations frosting flavors at my grocery store for a while now and wondering if they were any good.  Have you seen them there on the cake mix aisle?  You buy the can of frosting "starter" and then pick a flavor pack to stir into the frosting.  Some of the flavors sound pretty good -- caramel, chocolate almond, cinnamon roll -- but the one that really caught my eye and piqued my curiosity was bubblegum.  I should preface this whole post by saying that I. Love. Bubblegum!  I love the flavor of it and the smell of it.  But not just the chewing gum.  I love bubblegum lip gloss and I pick all the bubblegum Jelly Bellies out of the mix and save them for myself.  I also love Baskin Robbins bubblegum ice cream. It's my favorite.  So this frosting was either going to be sooo right or sooo very, very wrong.  What better opportunity to give it a shot than a pot luck dessert buffet where I could pawn most of them off on other people's kids?

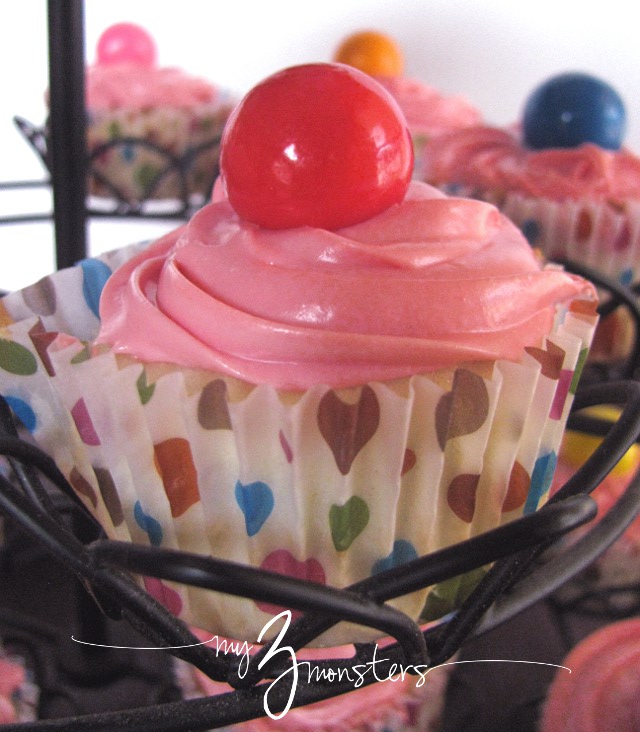
I'm ashamed to say that there's really no recipe here.  We just made white cake cupcakes and mixed the bubblegum frosting in the can.  Sis piped the frosting onto the cupcakes and I topped them all with a gumball to up the cute factor.  The first thing I noticed was that the smell was heavenly.  Spot-on.  Well done, Duncan Hines.  However, the frosting was a little soft for my liking.  It didn't hold up very well to being piped and was a little gooey.  Next time I'll try adding the flavor pack to my homemade buttercream frosting. I think that would give the frosting a more subtle pink color and a milder bubblegum flavor that lots of people above the age of six might enjoy more, too.


I thought the cupcakes tasted really good, but the bubblegum flavor was pretty strong.  NO complaints from anyone though.  I will be making these again sometime FOR SURE.  Maybe Sis can make them again for my birthday next month . . . I just can't help thinking how perfect these would be for a little girl's Pinkalicious birthday party or something.  Where was Duncan Hines ten years ago when I was doing little girl birthday parties?!

Thanks for stopping by!  Come back tomorrow for a super-simple Halloween decor idea.


Lil\'LunaThe 36th AVENUE

9.07.2012

NECTRESSE Sweetener --
{Here's the Scoop!}

This is a Sponsored post written by me on behalf of Nectresse™ Sweetener for SocialSpark. All opinions are 100% mine.
Nectresse product family.jpg
Remember the lemonade I made last week?  Mmmmmm.... it may be time for another batch, but that's beside the point.  I mentioned that I had used a new natural no-calorie sweetener called Nectresse and I was really impressed so I wanted to give you a little bit more information about it.
We've been trying to cut down on our sugar consumption as a family since we have a kiddo with type 1 diabetes.  The only problem?  We all have a major sweet tooth!  I've been hesitant to use too many artificial sweeteners because that just doesn't seem . . . natural. {duh!}  When I heard about Nectresse, I was excited to give it a shot.  NECTRESSE™Sweetener ,from the makers of Splenda, is a 100% natural sugar substitute made from monk fruit extract.  In fact, it is the only 100% natural sweetener  made from fruit.
NECTRESSE is 150 times sweeter than sugar and can be used in cooking and baking -- love that!  Lisa Ling is the brand's spokesperson.  Here's what she has to say about it:
I thought I'd share my lemonade recipe again, adapted for using Nectresse instead of sugar.  I really recommend you give it a try, even if you don't have health issues you are concerned about.  My family couldn't even tell the difference!!  They drank this lemonade faster than any soda I've ever brought into our home.  That's pretty high praise!  {I know, I know.  I shouldn't be bringing soda into our home.  Maybe now I won't be so tempted . . . }
1.  Juice 8-10 lemons to make 1-1/2 C. juice.  My bag of lemons didn't give me quite enough juice and the ones on my tree outside are not ripe, so I added about 1/4 C. of bottled lemon juice.  That's probably a big no-no if you're a lemonade purist, but it turned out great in a pinch.
2.  In a large pitcher, mix lemon juice and 1 C. sugar or sugar substitute.  I only used 1/2 C. of Nectresse and it was PLENTY sweet, but still tart like good lemonade should be.  I liked that it was refreshing and not at all syrupy like some lemonade.
3.  Add 5-1/2 C. lukewarm water and stir until the sugar is dissolved.  Chill it until it's icy-cold and enjoy!  Or throw some crushed ice in a glass and enjoy immediately.
Don't just take my word for it, though.  You can get a FREE sample of NECTRESSE™Sweetener  and see for yourself.  I'm excited to try a baked good with it for Family Night treat on Monday -- I'll let you know how it goes!
Visit Sponsor's Site

9.03.2012

"If You Can't Say Anything Nice . . . "

I've banished myself to the blog penalty box this past week.  I've been bad.  And grumpy.  On the verge of a breakdown, really.  I've vowed to keep it real around here, and I do, but I also always try to look for the silver lining on every cloud.  If I ever get so down in the dumps that I can't think of anything nice to say, I prefer to keep it to myself {and, unfortunately, my immediate family} which is where I've been for the past few days.

They say "when it rains, it pours", but sometimes I wonder if it ever stops.  This past year has been a kind-of permanent rainy season for us.  That's not all bad -- with a lot of rain come a lot of rainbows.  We've grown a lot and have become very grateful for EVERYTHING and EVERYONE that we have in our lives.  With that said, this past week's flash flood of troubles has had me completely swamped. 

Brent was in a car accident about ten days ago, which was troubling.  That's a phone call you never want to get, but he was fine and we have good insurance.  Then we found out that the car was totaled. Our new car {new to us anyway, and in pristine condition}that we have only had for a couple of months was kaput.  The one that we got not because we wanted a new car, but because our last car completely died -- like, beyond repair.  Not our van that is on it's last legs anyway, but our good car is no more.  

So we will have to share a single car until we can save up another down payment.  It will be fine.  It will mean me spending hours in the car everyday picking people up and dropping them off all over the valley, but at least we still have the van.  I can see that as a blessing now.  For the past few days, not so much.  

To add insult to injury, the air conditioner in our home decided to stop blowing cold air.  I called the repair company and they came out within a couple of hours, which is super awesome because it is still hot here.  Real, real hot.  $700 and a new condenser motor later we were back in business.  There went a big chunk of the down payment on a second new car, but, luckily, my husband has been working so we had the money in our account to pay for it.  Also luckily, his contract at his job was extended by six weeks.  I can also see now how those blessing far outweigh the troubles, but it has taken me a little while to get here.

I have been stuck in the middle of a major pity party this past week.  It didn't feel fair that we have to struggle so much while people all around us have it so easy.  {I know that that's not true -- everyone has their struggles -- but when you're a pity party you put blinders on to those truths.}  I was angry and bitter and really, really unpleasant.  I hate feeling that way, but I couldn't rise above it.  I didn't want to recognize all the great things that had happened in that same span of time.  It was easier to be angry and sad.  

It didn't help that I was feeling physically ill at the same time.  My skin has been hurting, like I have a rash or something, but I don't, and if I do anything very strenuous, my blood sugar drops and I get shaky and sweaty and feel awful . {I don't know how my Riley does it every day.}  I spent two or three days laying on the couch doing very little, which gave me a lot of time to feel a lot sorry for myself. 

Sometimes you just have to take the bull by the horns and put an end to the pity party.  I have had to force myself to say a prayer of gratitude for a blessing in my life every single time a negative thought crosses my mind.  I've had to force myself to carry on with my family and church responsibilities as if nothing were wrong.  I've also had to let people step in and help with things that were too big for me to do on my own, and recognize how blessed I am that there are plenty of people who want to help.  I've had people who have no idea what's going on in my life {or me head} call out of the blue and offer to take on some of my responsibilities, and then call again to thank me for letting them do it.  If that is not evidence of a loving Heavenly Father working through righteous people to take care of his child, I don't know what is.

Things seem a lot brighter today.  I feel better physically and emotionally.  Hopefully I'll get some fun things posted this week.  Thanks for hanging in there with me!

Related Posts Plugin for WordPress, Blogger...