

If you're joining us for the first
time today, welcome! This is day 25 of a 31-day series about how to give a room in
your home a brand new look, from top to bottom, completely DIY.

So, yesterday we worked on creating the top of the duvet cover with all the arched ruffles. Today we'll put it all together and finish it. I do have a disclaimer to make before we get started, however. There are precious few projects that I have done in my lifetime that were so tedious as to make me swear, absolutely, that I would never make one again. This duvet cover is one of them. Not that it's difficult. The skills involved are pretty basic, I think. It's the gather-pin-sew-repeat ad nauseum aspect that killed me. And a duvet cover {even a twin size} is big and bulky and awkward to work with. And it just keeps getting heavier and more awkward the more arches you sew on there. Just keepin' it real for you, folks. In summary: glad I made it once, never doing it again. Lots of people love sewing a lot more than I do, though. Lots of people have a lot more patience than I do, too. This project is for those people.
Now that I have you all excited about it, let's get to finishing this project!
Today you're going to need:
10 strips of white jersey knit fabric, cut 3" wide by the width of the fabric
the second flat twin-size sheet from yesterday
the 9" piece of fabric you cut off the sheet you used yesterday for the duvet top
2 yards of white grosgrain ribbon to tie the duvet cover closed
Step 1: Sew your strips of knit fabric together, end to end to make your ruffle for the edge of the duvet cover. When you are finished you will have one VEEEEERRRRRYYYY long strip of fabric.
Step 2: Gather the long strip of fabric into a ruffle. There are a bunch of different ways to do this. I like to crank the tension on my sewing machine up as high as it will go and set the stitch length as long as it will go and then sew down the edge of my fabric about 1/2" in from the edge. Messing with the tension and stitch length like that will make your machine gather the fabric for you. {Woot woot!} I find that the faster you sew it, the tighter the gathers get. No need to be a speed demon here. Just go at an average pace.
Step 3: Lay your duvet top out flat, right side up, then lay out your ruffled piece all around the perimeter. Line up the gathered edge of the ruffle, right side down, with the outer edge of the duvet top. Make sure all the arches on the duvet top are laying flat. Pin it in place and then sew it on all the way around using a basting stitch on your sewing machine. {Don't forget to return the tension to normal setting. Gathers here = bad.}

Step 4: Lay your duvet top out flat again, right side up. Take the base fabric you cut off the duvet top yesterday and lay it, right side down, across the bottom edge of the duvet top, lining up the raw edges. Pin in place.

Step 5: Lay second flat sheet, right side down, on top of duvet top. The hemmed bottom edge of the sheet should overlap the piece you just pinned on and be about 2" above the bottom edge of the duvet cover.
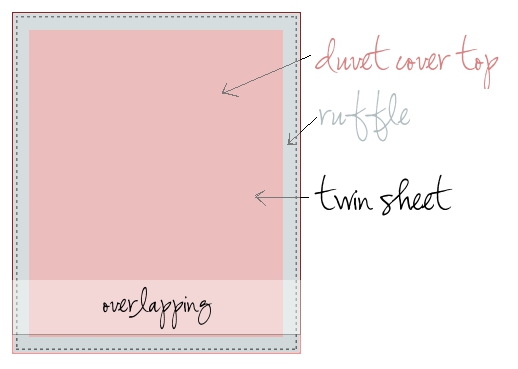
Pin it in place up the sides. When you get to the top edge you'll have some extra fabric {like yesterday}. Cut that off then sew all the way around the edge with a 1/2" seam allowance.
Step 6: Turn the duvet cover right side out and enjoy your masterpiece! Cut your grosgrain ribbon into 12-inch lengths. Mark the overlapping flap at the bottom of the duvet cover back every 16 inches with a pin. Sew one piece of ribbon onto each marked spot. Them mark the corresponding point on the main piece of the duvet cover back -- this is where you will sew the other pieces of ribbon .

Insert your duvet and tie the ribbons together in bows. All finished!! Hallejuah, you survived this marathon sewing project!
Here's what mine looks like now that it's all finished:
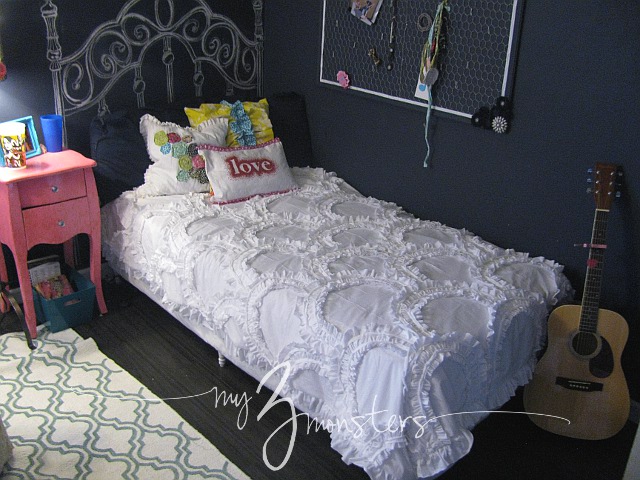
It's really feminine and fun and I love how the white reflects so much light back into the room! I was getting a little worried that this was going to be a really dark space, but adding this one big white element REALLY helps. If the duvet looks a little flat it's because there isn't one in there . . . yet. I'm looking for a bargain on a lightweight down comforter. For now, that's just the cover laid across her bed. You would not believe how heavy it ends up being. I think it's probably plenty warm enough alone -- especially in the summer. I plan to make a matching pillow sham for Sis's extra sleeping pillow. That big navy blue beast in the photo is her body pillow.
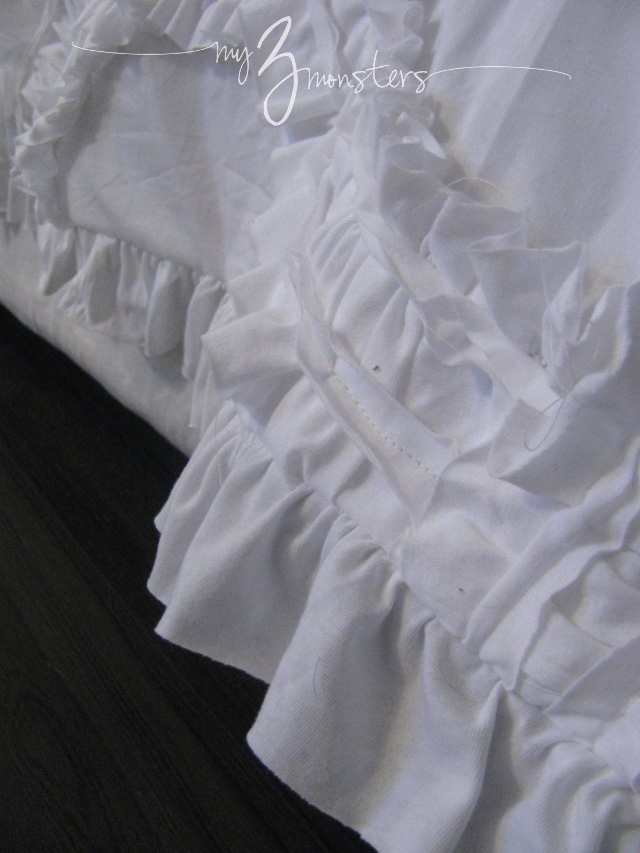
Here's a close-up of the finished ruffled edge:
Here's a close-up of the finished ruffled edge:
And one more of the bed for good measure:
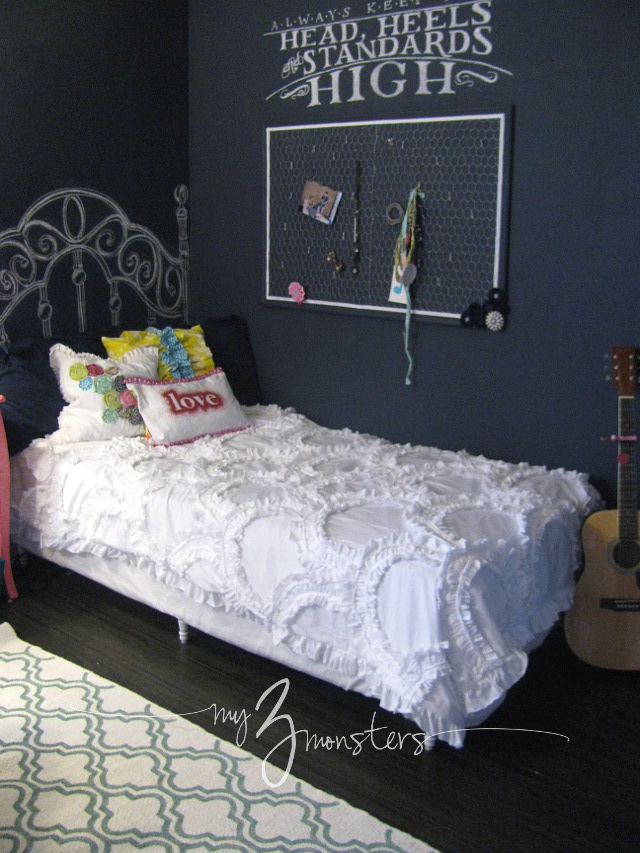
It's cool to see everything finally coming together. I couldn't be more pleased with the results. What do you think? Was it worth the effort?
I hope you'll join me tomorrow for a quick little reading lamp makeover. Thanks for stopping by today!


Great job! The bed looks fantastic!
ReplyDeletePlus, I think that matching duvet and pillows on inspirational photo are "too much" - I like your mismatched look much more!
Thanks! I have always been categorically opposed to matchy-matchy sets. I prefer a mismatched, eclectic look, too.
DeleteBeautiful! I love it.
ReplyDeleteThanks so much!
DeleteIf ruffles are something you're going to do often, you may look at getting a ruffler foot for your sewing machine. You can pick them up for $10-15 (and sometimes quite a bit less) on eBay, or probably a little more at a sewing machine shop. It makes perfect ruffles every time and you can attach the ruffle to the fabric at the same time. Plus, it's fascinating to watch. :)
ReplyDeletehttp://www.youtube.com/watch?v=j19xV5Crp_Q
I have always wanted a ruffler foot. It's just one of those things I don't think about until I'm in the middle of a big project like this. Maybe Santa will put one in my stocking this year . . .
DeleteI am absolutely in love with this! It's beautiful =)
ReplyDeleteAmazing! I love it. www.thethreeofus.posterous.com
ReplyDeleteVery nice!
ReplyDeleteAwesome!!! Love every part of it (thumbs up).
ReplyDeleteWow. Just wow. You're daughter is one lucky lady. I hope I can be as creative with my little girls big girl bedroom. Thank you for the inspiration.
ReplyDeleteThanks everyone! I had fun seeing it all come together.
ReplyDeleteThis is unbelievably beautiful and you did a fabulous job. It was an extremely clever and creative idea to start with, but you took it "to the limit" of style and class. I hope your daughter is still loving it, but if not, I'll send you my address.
ReplyDeleteAbsolutely phenomenal and thank you for sharing.