

I absolutely fell in love with this chandelier project at Tatertots & Jello a few weeks ago. I love the cool, modern, beachy vibe of it. {I pretty much love most things Jen makes, but that is beside the point here.} When my bathroom makeover project started expanding, and I needed a new light fixture quick and cheap, this immediately came to mind.

I started with a small scale brass fixture someone else had cast off and I had adopted into my little family of future projects. Since shiny brass didn't fit into my plans {and I had a half a can of spray paint leftover from the mixer makeover} I sprayed the fixture gray. Immediately it looked better, but it was still pretty plain.
I picked up some 1/2-inch and 3/4-inch wood beads with holes drilled in the center at the local craft store for about $1.50 a pack. I also found the same {or similar} hematite beads that Jen used for her chandelier. I had about $15 invested at this point so I ran home to get to work, praying it would look good.

I pretty much followed the tutorial at Tatertots & Jello, stringing my beads and attaching them to the light fixture. The attaching part was not as easy as you might think. I broke my three smallest drill bits in the process, but eventually I got the job done. Why do they even make drill bits that small anyway? I'm sure I've broken those same three before.
I also sewed a cord cover to hide the ugly brass chain when I hang it. It's basically just a long tube of fabric that gathers up onto the chain. Nothing fancy. I'm really trying to stick to a tight budget on this project so instead of having the outlet rewired from the wall to the ceiling, I screwed a hook in the center of the ceiling and will swag the chandelier over to where it needs to be. It's a perfect, SUPER inexpensive solution.
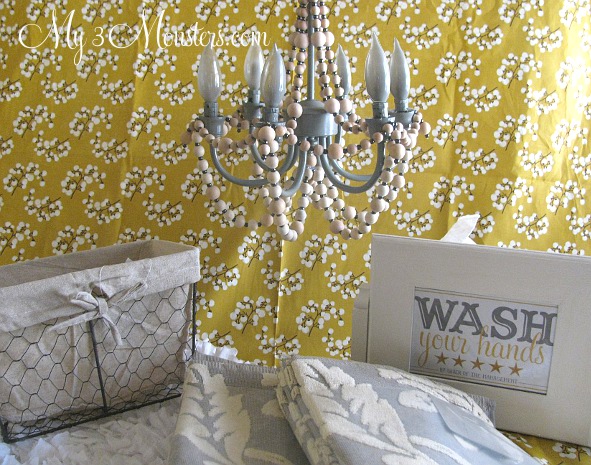
You've seen some of the projects I've been working on for the funky gallery wall in this bathroom, but here's a sneak peak at some of the other elements of the room.
You've seen some of the projects I've been working on for the funky gallery wall in this bathroom, but here's a sneak peak at some of the other elements of the room.
So . . . whaddaya think? I'm really excited about how it's all coming together!.


love the chandelier! Very cute,and it matches everything else perfectly
ReplyDeletelauren
wow, totally love it!
ReplyDeleteLove! I missed this post on Tater's page, so I'm glad I caught yours. I painted a brass-y chandelier a cute lime green, but didn't think to add beads? Now I know what's missing! -diane
ReplyDelete